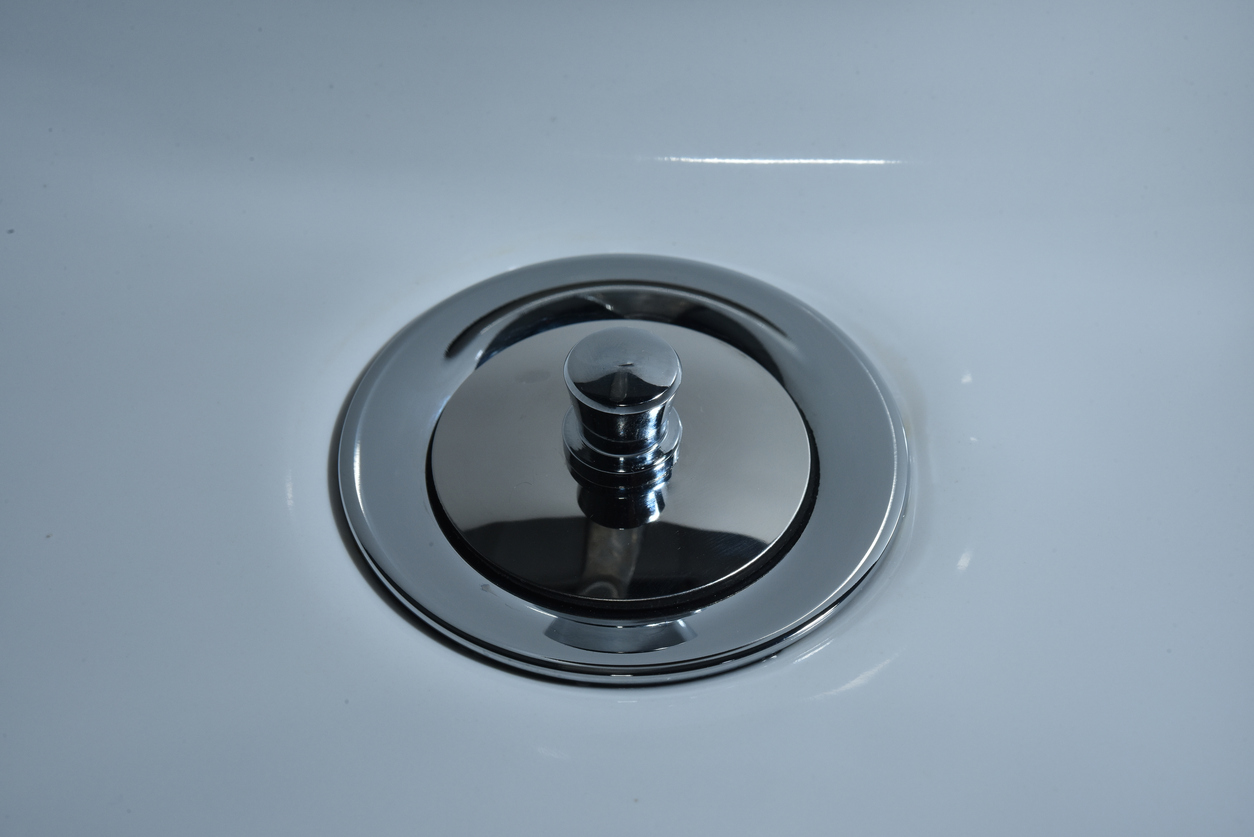
20+ Common Bathtub Drain Stopper Types in 2025 – Which is best for your bathtub?
Choosing the right bathtub drain stopper is essential for creating a comfortable and functional bathing experience. With over 20 common
Installing a freestanding bathtub is a project most homeowners with basic plumbing experience can handle in a single day. The process isn’t complicated, but it does require careful preparation, especially around the drain connection and making sure your floor can support the weight.
This guide walks you through everything from planning to the final leak test, so you can get your tub installed properly. If at any point the plumbing work feels beyond your comfort level, bring in a licensed plumber for that portion. There’s no shame in it, and it’s far cheaper than fixing water damage later.
As a freestanding bathtub manufacturer, we’ve seen hundreds of installations go smoothly and a handful go sideways. The difference almost always comes down to preparation, not skill. This guide reflects what we’ve learned from our customers’ installations and our own testing.
Gather everything before you start. Nothing slows down an installation like a trip to the hardware store halfway through.
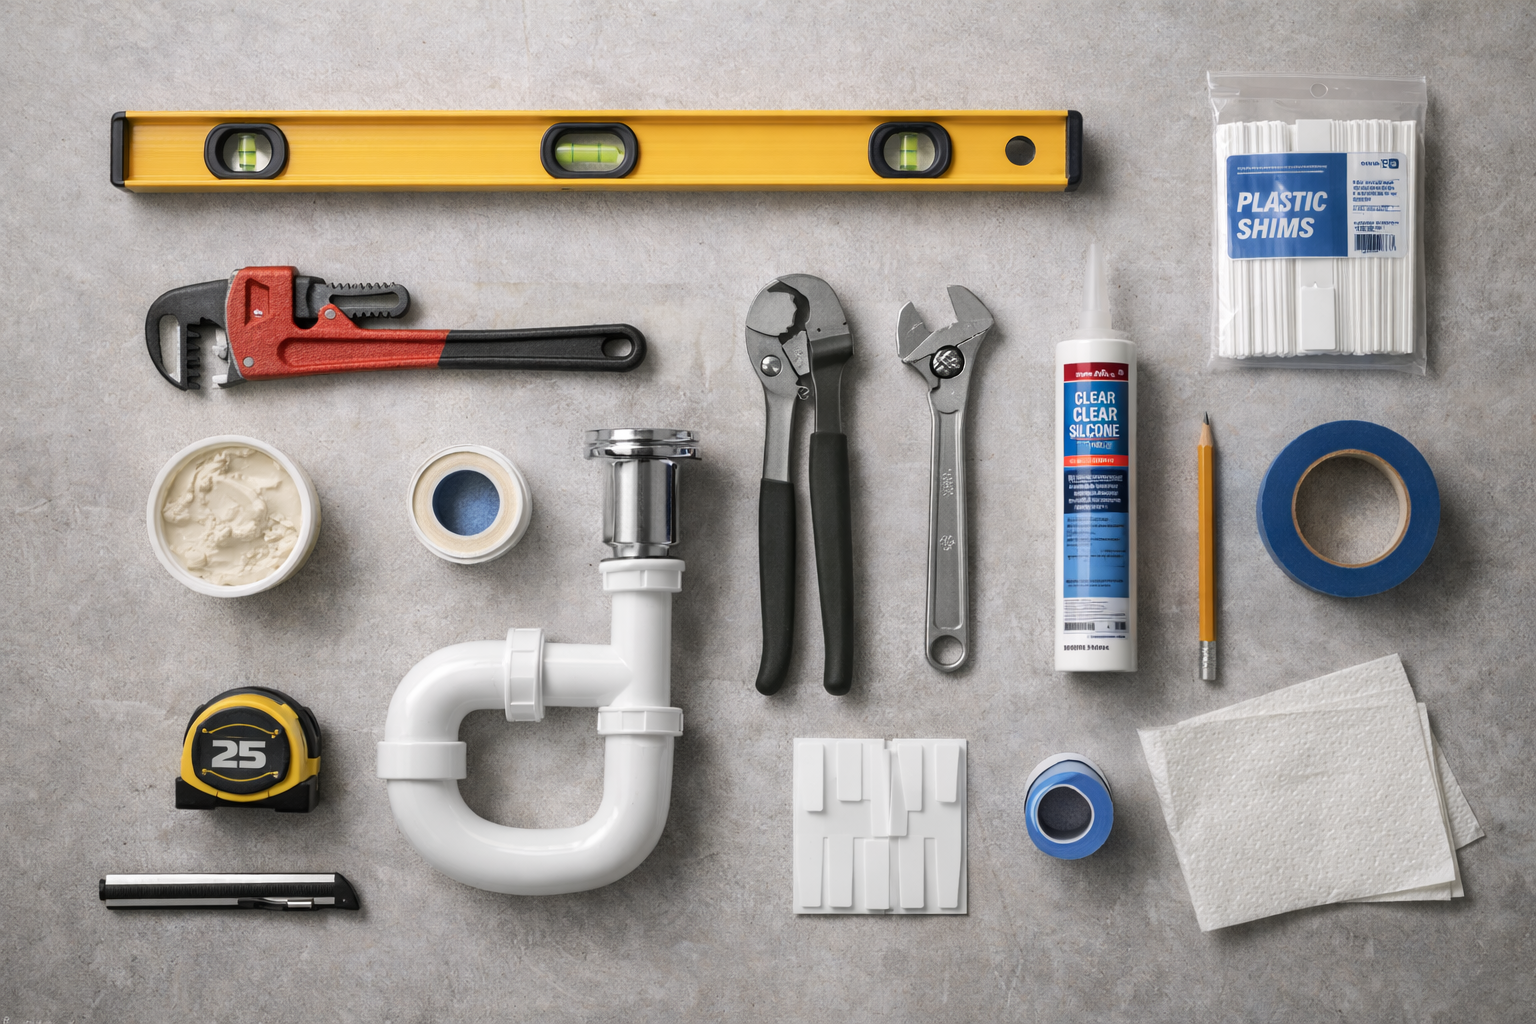
Tools:
Materials:
A filled freestanding bathtub weighs between 600 and 900 lbs depending on the tub size and material. A standard 60-inch stone resin tub filled with water and a person in it puts roughly 700 lbs on the floor.
If your home was built to current building codes, your floor framing is rated for at least 40 lbs per square foot of live load (IRC Section R301.5), which is enough for most freestanding tubs on the ground floor.
If you’re installing on a second floor, or if your home is more than 40 to 50 years old with original framing, have a structural engineer or home inspector verify your floor joists can handle the concentrated load. This inspection usually costs $150 to $300 and is worth every dollar. A tub falling through a weakened floor is not a problem you want to discover after installation.
Before you position anything, locate your existing drain line in the floor. The tub’s drain outlet needs to align with the rough-in, or you’ll need to move the drain, which adds significant cost ($500 to $2,000+ depending on access).
If you’re working with new construction or a full remodel, this is the time to place the rough-in exactly where you want the tub’s drain to sit. Measure from the wall to the center of the drain opening and record it.
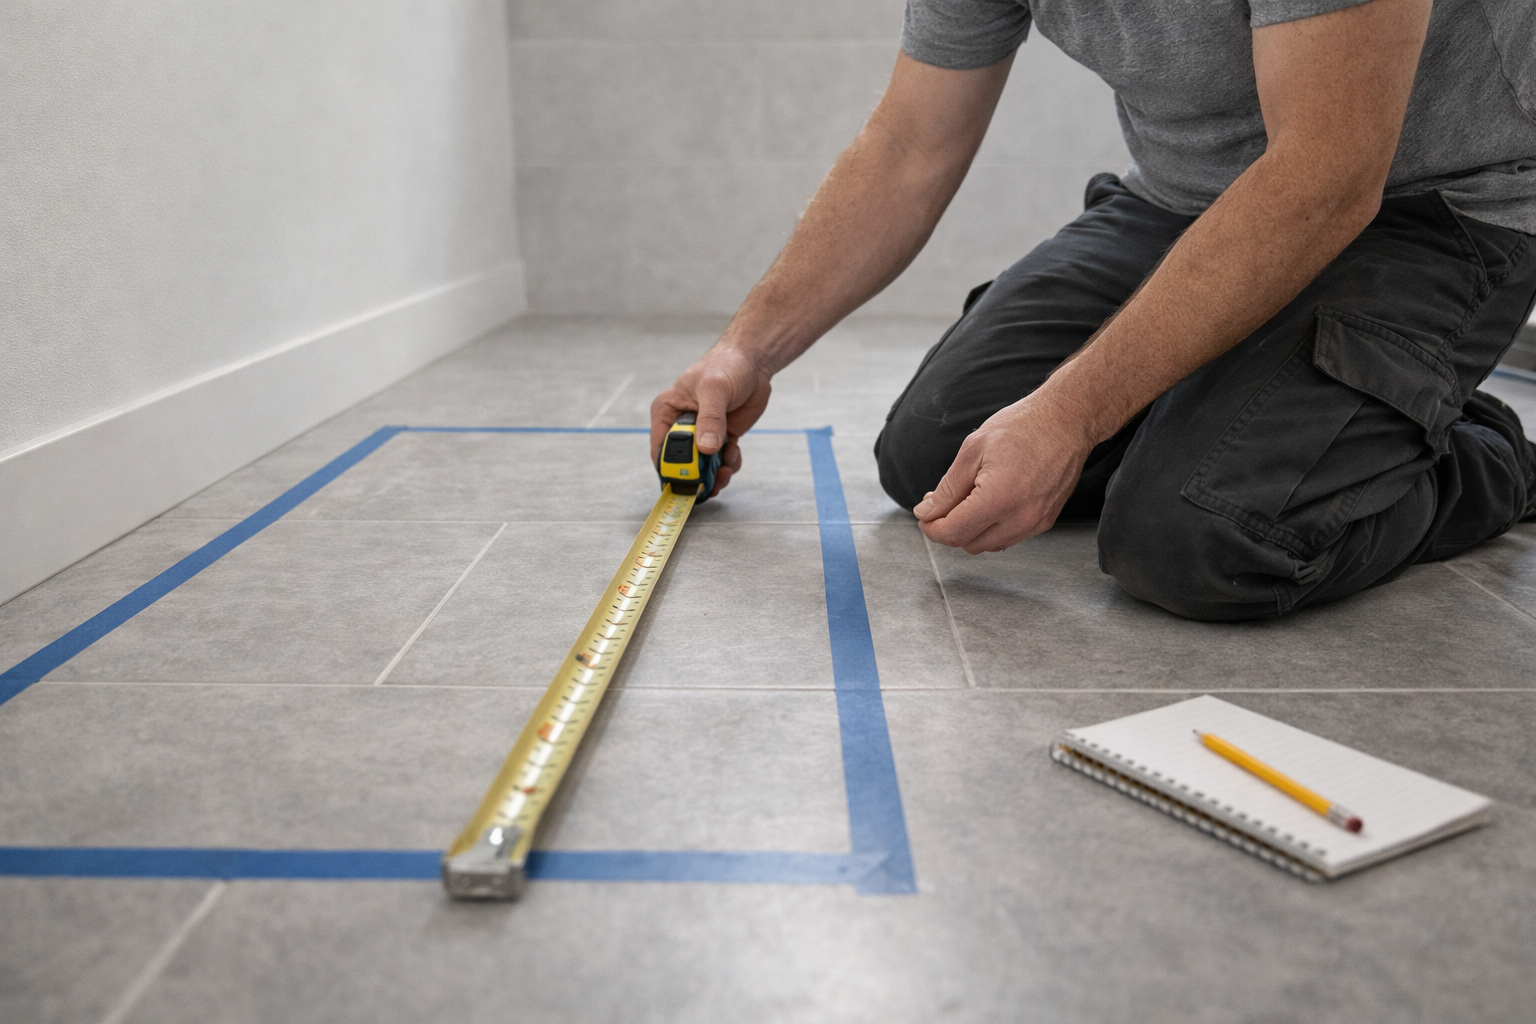
Measure the length, width, and available clearance around where the tub will sit. You want at least 6 inches of clearance between the tub and any wall. This isn’t about aesthetics. It’s about being able to clean behind the tub and preventing moisture from getting trapped between the tub and the wall, which leads to mold.
Also confirm that the tub can physically fit through your doorways and hallways to reach the bathroom. This sounds obvious, but freestanding tubs are large and rigid. Measure every doorway and turn along the path.
Decide how you’ll fill the tub before you start the installation, because it affects your plumbing layout:
Lay a protective blanket or thick cardboard on the floor where you’ll be working. Cover the path from the doorway to the installation spot. Freestanding tubs, especially stone resin and cast iron models, will scratch tile and hardwood if dragged across unprotected flooring.
If your tub weighs more than 150 lbs (most stone resin and cast iron tubs do), get a second person to help move it. Do not try to muscle a heavy tub into position alone.
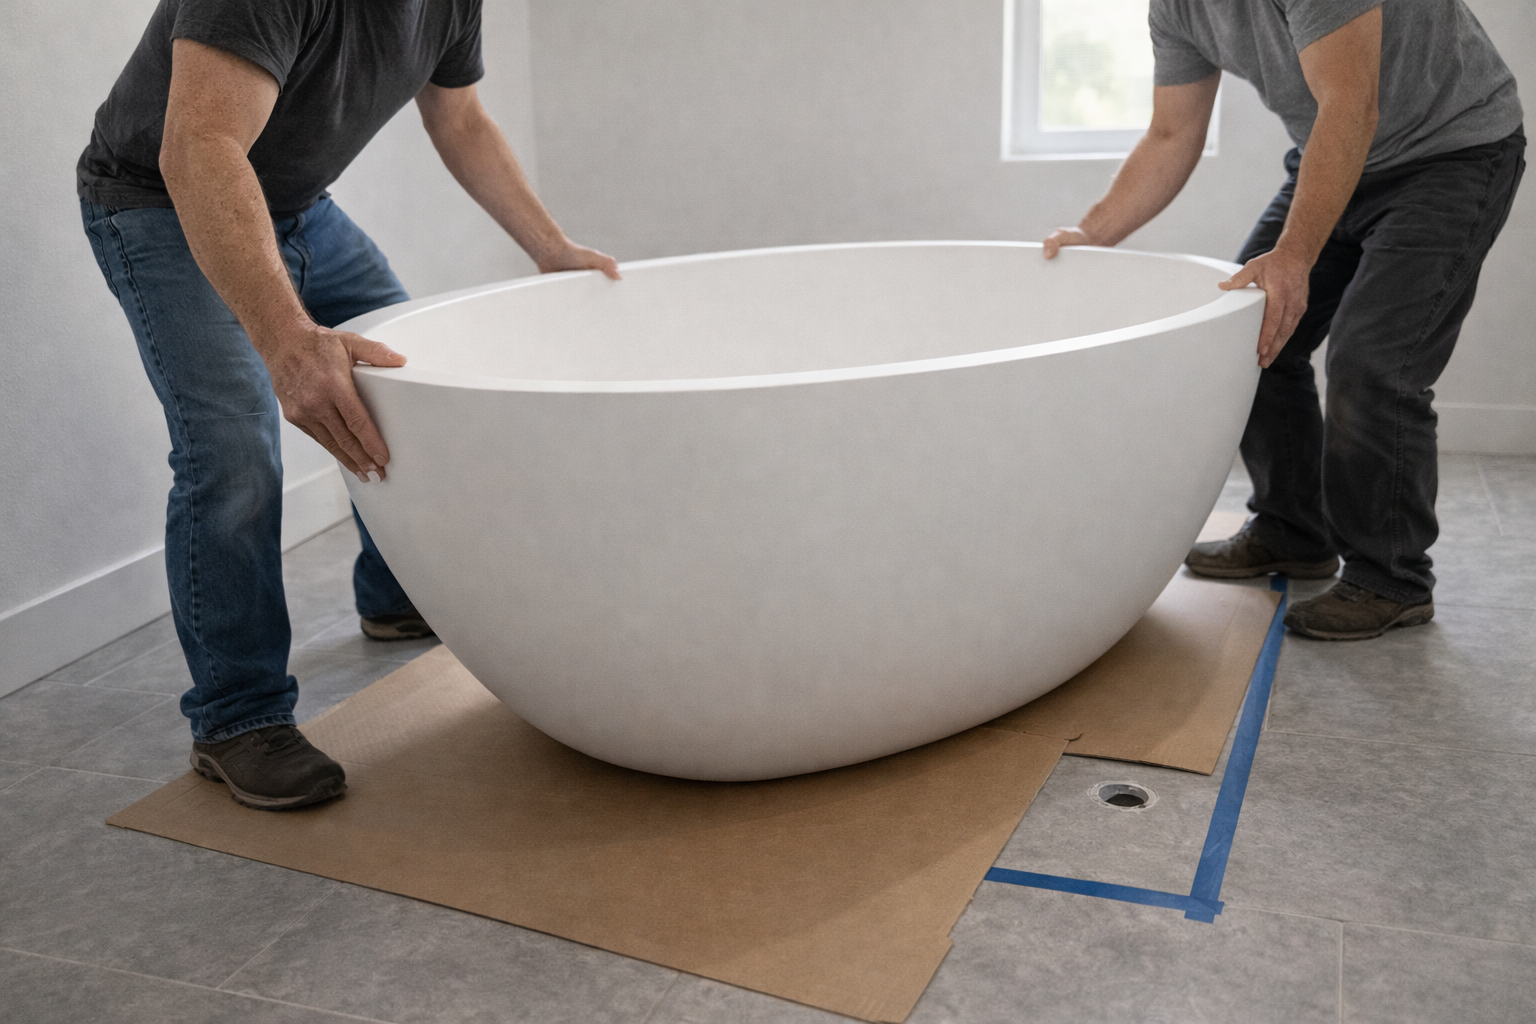
Move the tub into its intended position without connecting anything. This is your chance to confirm three things:
Mark the tub’s footprint on the floor with painter’s tape so you can find the exact position again after you flip it for drain work.
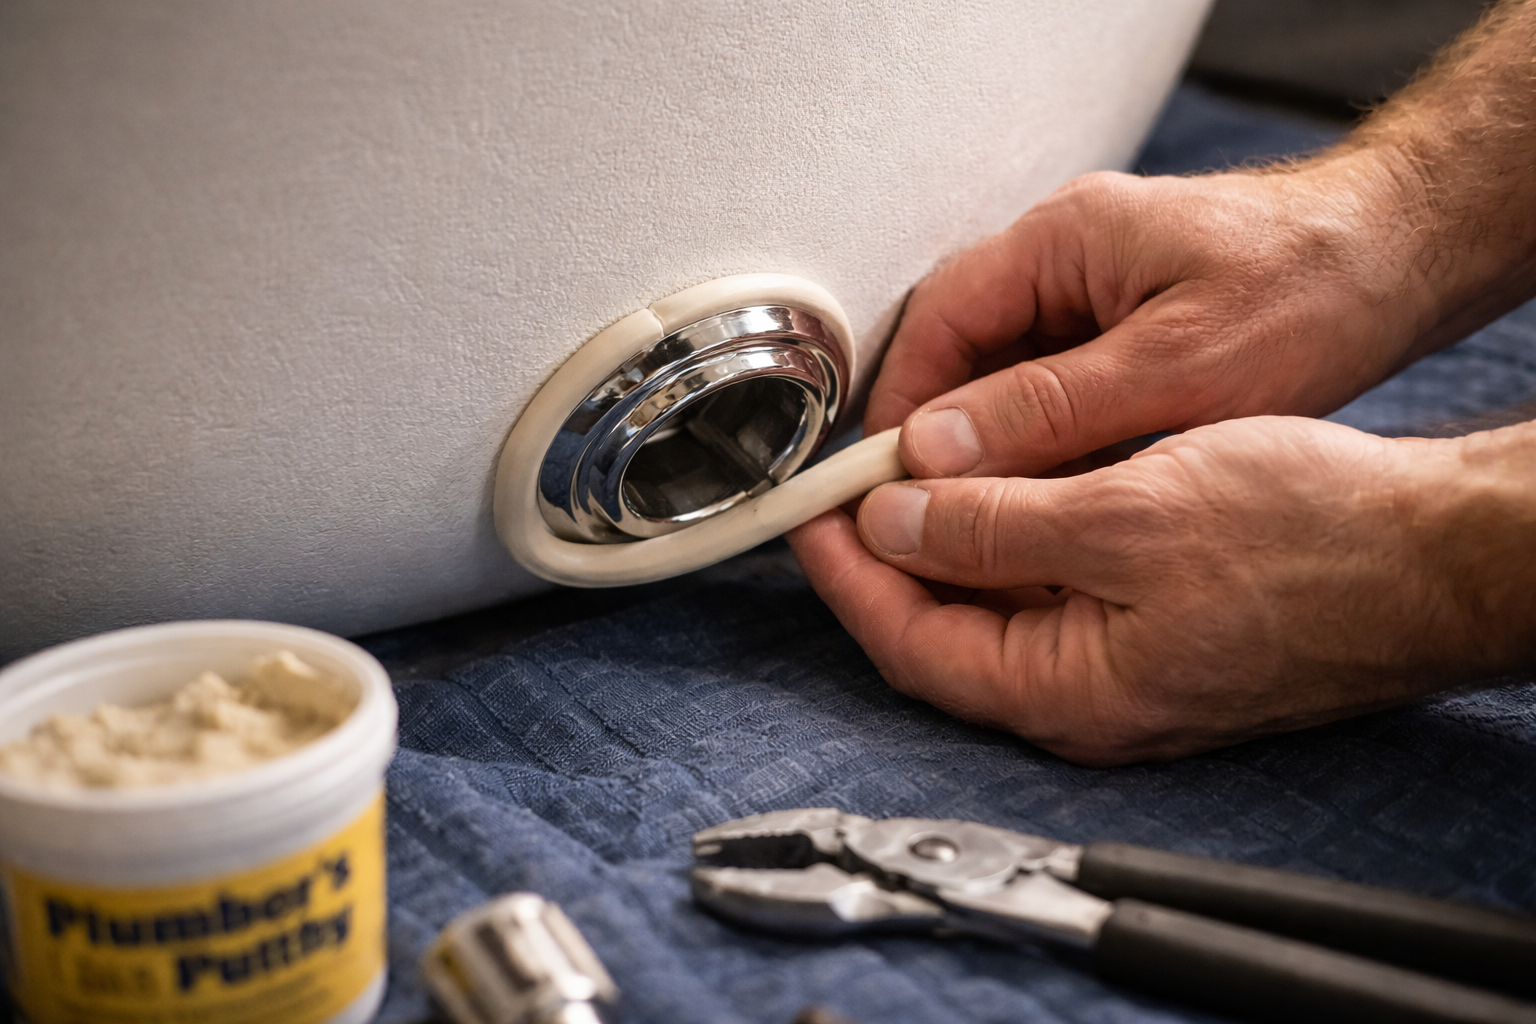
This is the most important step. A bad drain connection is the #1 cause of leaks in freestanding tub installations.
We say this from direct experience. The majority of warranty calls we receive at Badeloft trace back to the drain connection — either the putty wasn’t applied evenly, the flange was overtightened and cracked the seal, or the homeowner skipped the dry fit. Take your time here.
Using an EZ drop-in drain kit (easier option):
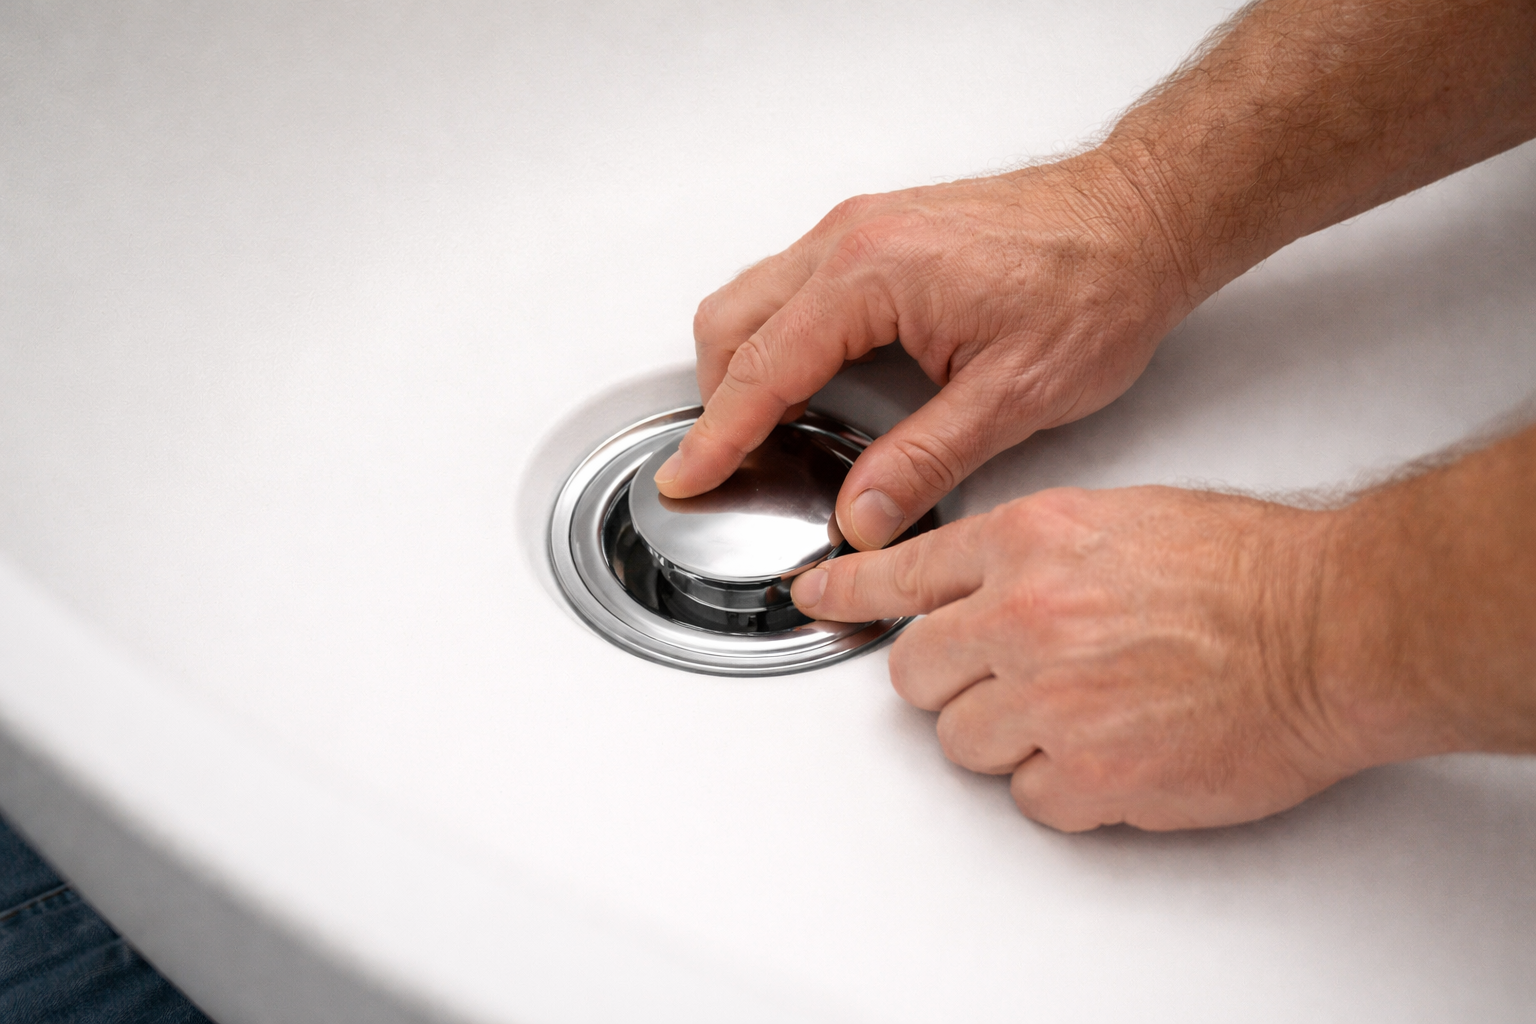
If your tub came with an EZ drop-in drain, or you purchased one separately, the process is simpler. The EZ drop-in drain is designed to slot directly into the tub’s drain opening without needing to tip the tub on its side. You press the drain body into place from above, secure it with the included hardware, and connect the tailpiece underneath.
Badeloft freestanding tubs ship with a compatible EZ drop-in drain, which cuts the drain installation time roughly in half and reduces the risk of a bad seal since the components are pre-fitted to the tub. We developed this system specifically because we saw too many installations go wrong at the drain connection — this was our engineering solution to the most common installation failure point.
If your tub has an overflow opening (most do), install the overflow drain assembly now while the tub is still on its side:
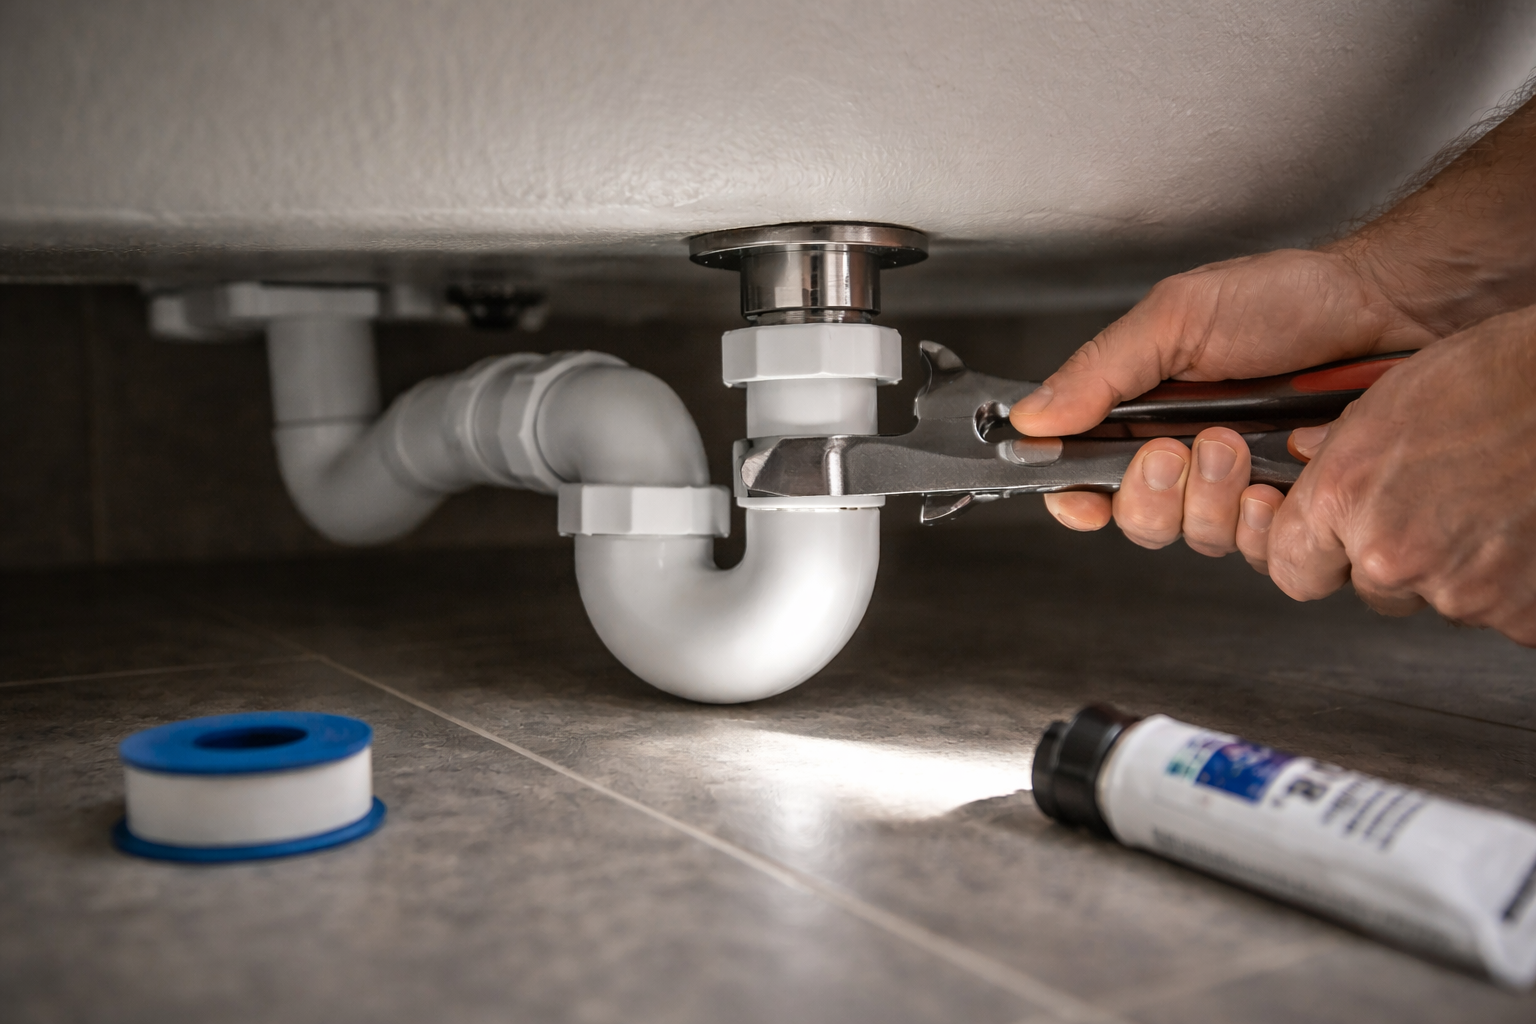
With the drain assembly and overflow connected, attach the P-trap to the bottom of the drain tailpiece:
Carefully move the tub back to the marked position on the floor (painter’s tape from Step 2). This is another two-person lift for heavy tubs.
If the drain doesn’t align: Use a flexible drain connector or offset fitting. These are available at most plumbing supply stores and can bridge a gap of 1 to 3 inches. If the offset is greater than that, you’ll need to modify the rough-in, which is a job for a plumber.
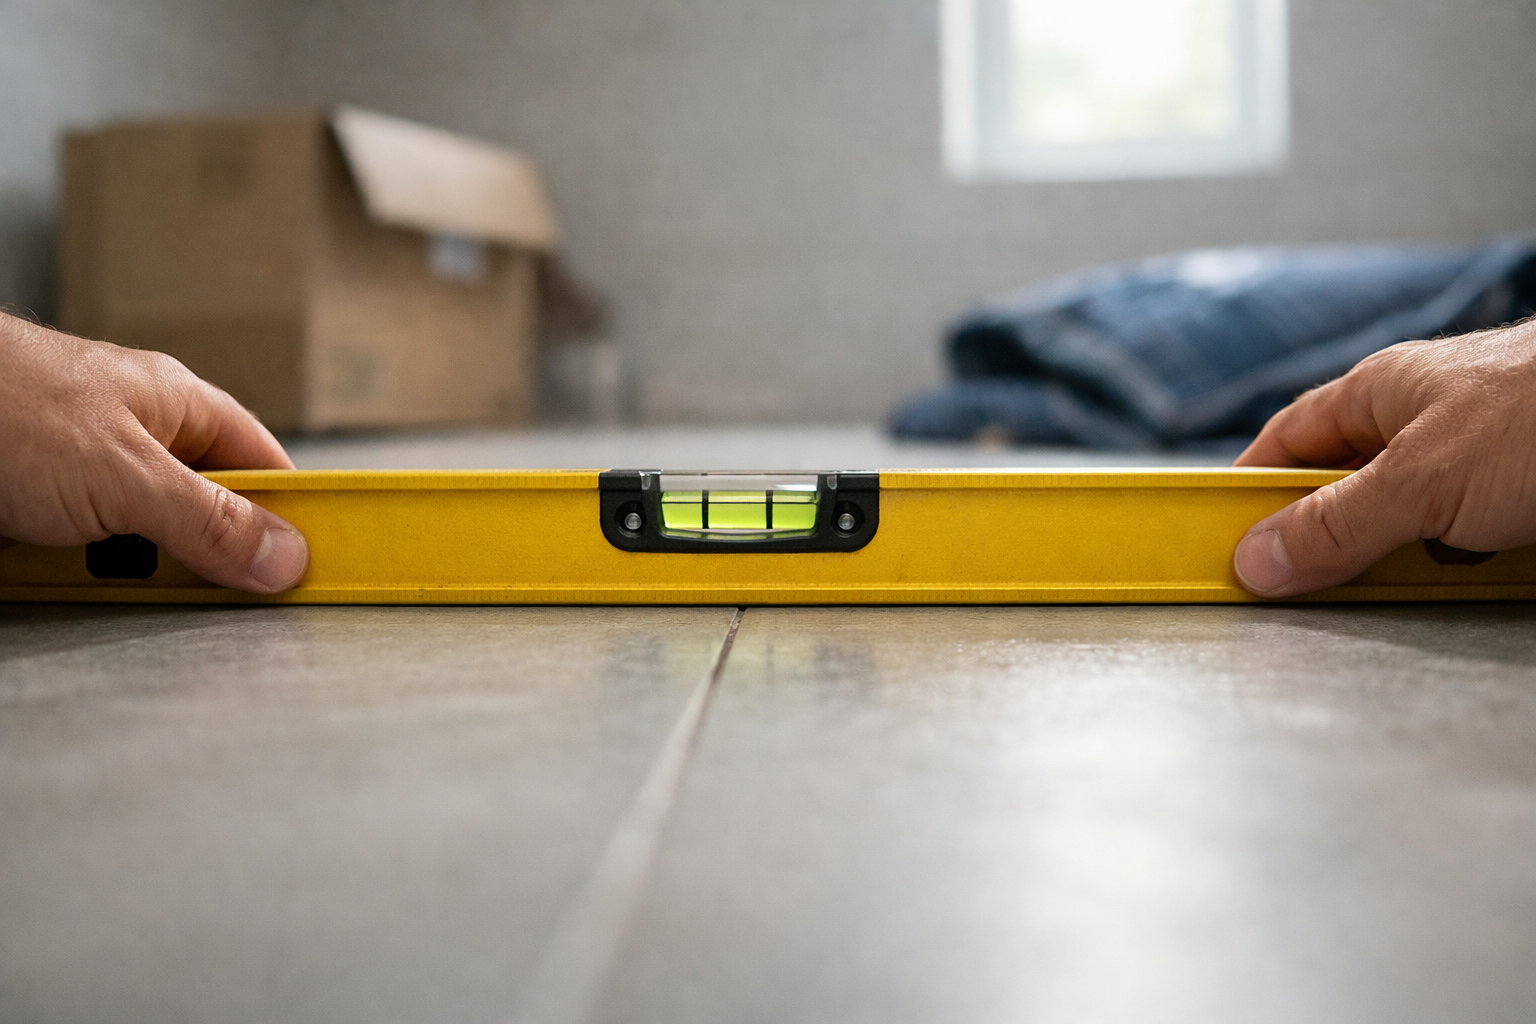
Place your level on the rim of the tub in both directions (lengthwise and widthwise).
This is a mistake we see regularly in customer photos — wood shims that looked fine during installation but swelled within months, causing the tub to shift. Plastic or composite shims cost the same and last indefinitely.
Before you call the job done, test everything:
If you find a leak, tighten the connection. If that doesn’t stop it, disassemble, check the washer, reapply putty or tape, and reassemble. Do not leave a slow drip and hope it stops. It won’t.
After installation: Wait 24 hours before using the tub. This gives the silicone caulk time to fully cure.
During your first real use, run through this quick checklist:
Want a printable version? Download our free installation checklist (PDF) to bring with you on installation day.
The floor isn’t perfectly level (almost no floor is). Add plastic shims under the base, recheck with your level, and re-caulk the base once it’s stable.
Use a flexible drain connector or offset fitting for gaps up to 3 inches. For larger misalignments, the rough-in needs to be moved, which requires cutting into the floor. That’s a plumber job.
The plumber’s putty wasn’t applied evenly, or the flange wasn’t tightened enough. Remove the flange, clean off the old putty, apply a fresh rope of putty, and reinstall. Make sure it’s snug but not overtightened.
The floor slope is directing water toward the tub base instead of away from it. This can also happen if the caulk seal around the base has a gap. Reapply caulk, making sure there are no breaks in the bead. If pooling persists, the floor may need to be re-leveled in that area.
The washer is either missing, damaged, or not seated correctly. Disassemble the connection, check the washer, replace it if it’s compressed or cracked, and reassemble. Slip-joint washers are cheap and available at any hardware store.
DIY makes sense if:
Hire a plumber if:
Our recommendation: If you’ve done basic plumbing work before and your rough-in is already in place, you can absolutely handle this yourself. The drain connection is the only part that requires real precision, and if you’re using an EZ drop-in drain, even that becomes straightforward. Where we always advise calling a professional is when the rough-in needs to move — that’s a different scale of project entirely.
Use a non-abrasive cleaner and a soft cloth. For stone resin tubs, mild dish soap and warm water is all you need for routine cleaning. Avoid abrasive scrubbers, undiluted bleach, and acidic cleaners (like vinegar-based products on stone surfaces), which can dull the finish over time.
For more on how different tub materials hold up, see our bathtub materials comparison guide. Stone resin, which is what we manufacture at Badeloft, is one of the lowest-maintenance materials available — it’s non-porous, so it doesn’t absorb water or stains the way fiberglass and basic acrylic do.
For stubborn stains on stone resin, mix 10 parts water to 2 parts household bleach, apply to the stain, let it sit for 15 minutes, then rinse thoroughly.
Check your drain monthly for hair and debris buildup. A drain cover or hair catcher ($5 to $10) prevents most clogs. If you notice slow draining, use a drain auger (drain snake) to clear the line. Avoid chemical drain cleaners, as they can damage certain tub materials and pipe fittings.
Check the silicone caulk around the tub base every 6 to 12 months. If you see gaps, peeling, or discoloration, scrape out the old caulk and reapply. This takes 20 minutes and prevents water from seeping under the tub where you can’t see it.
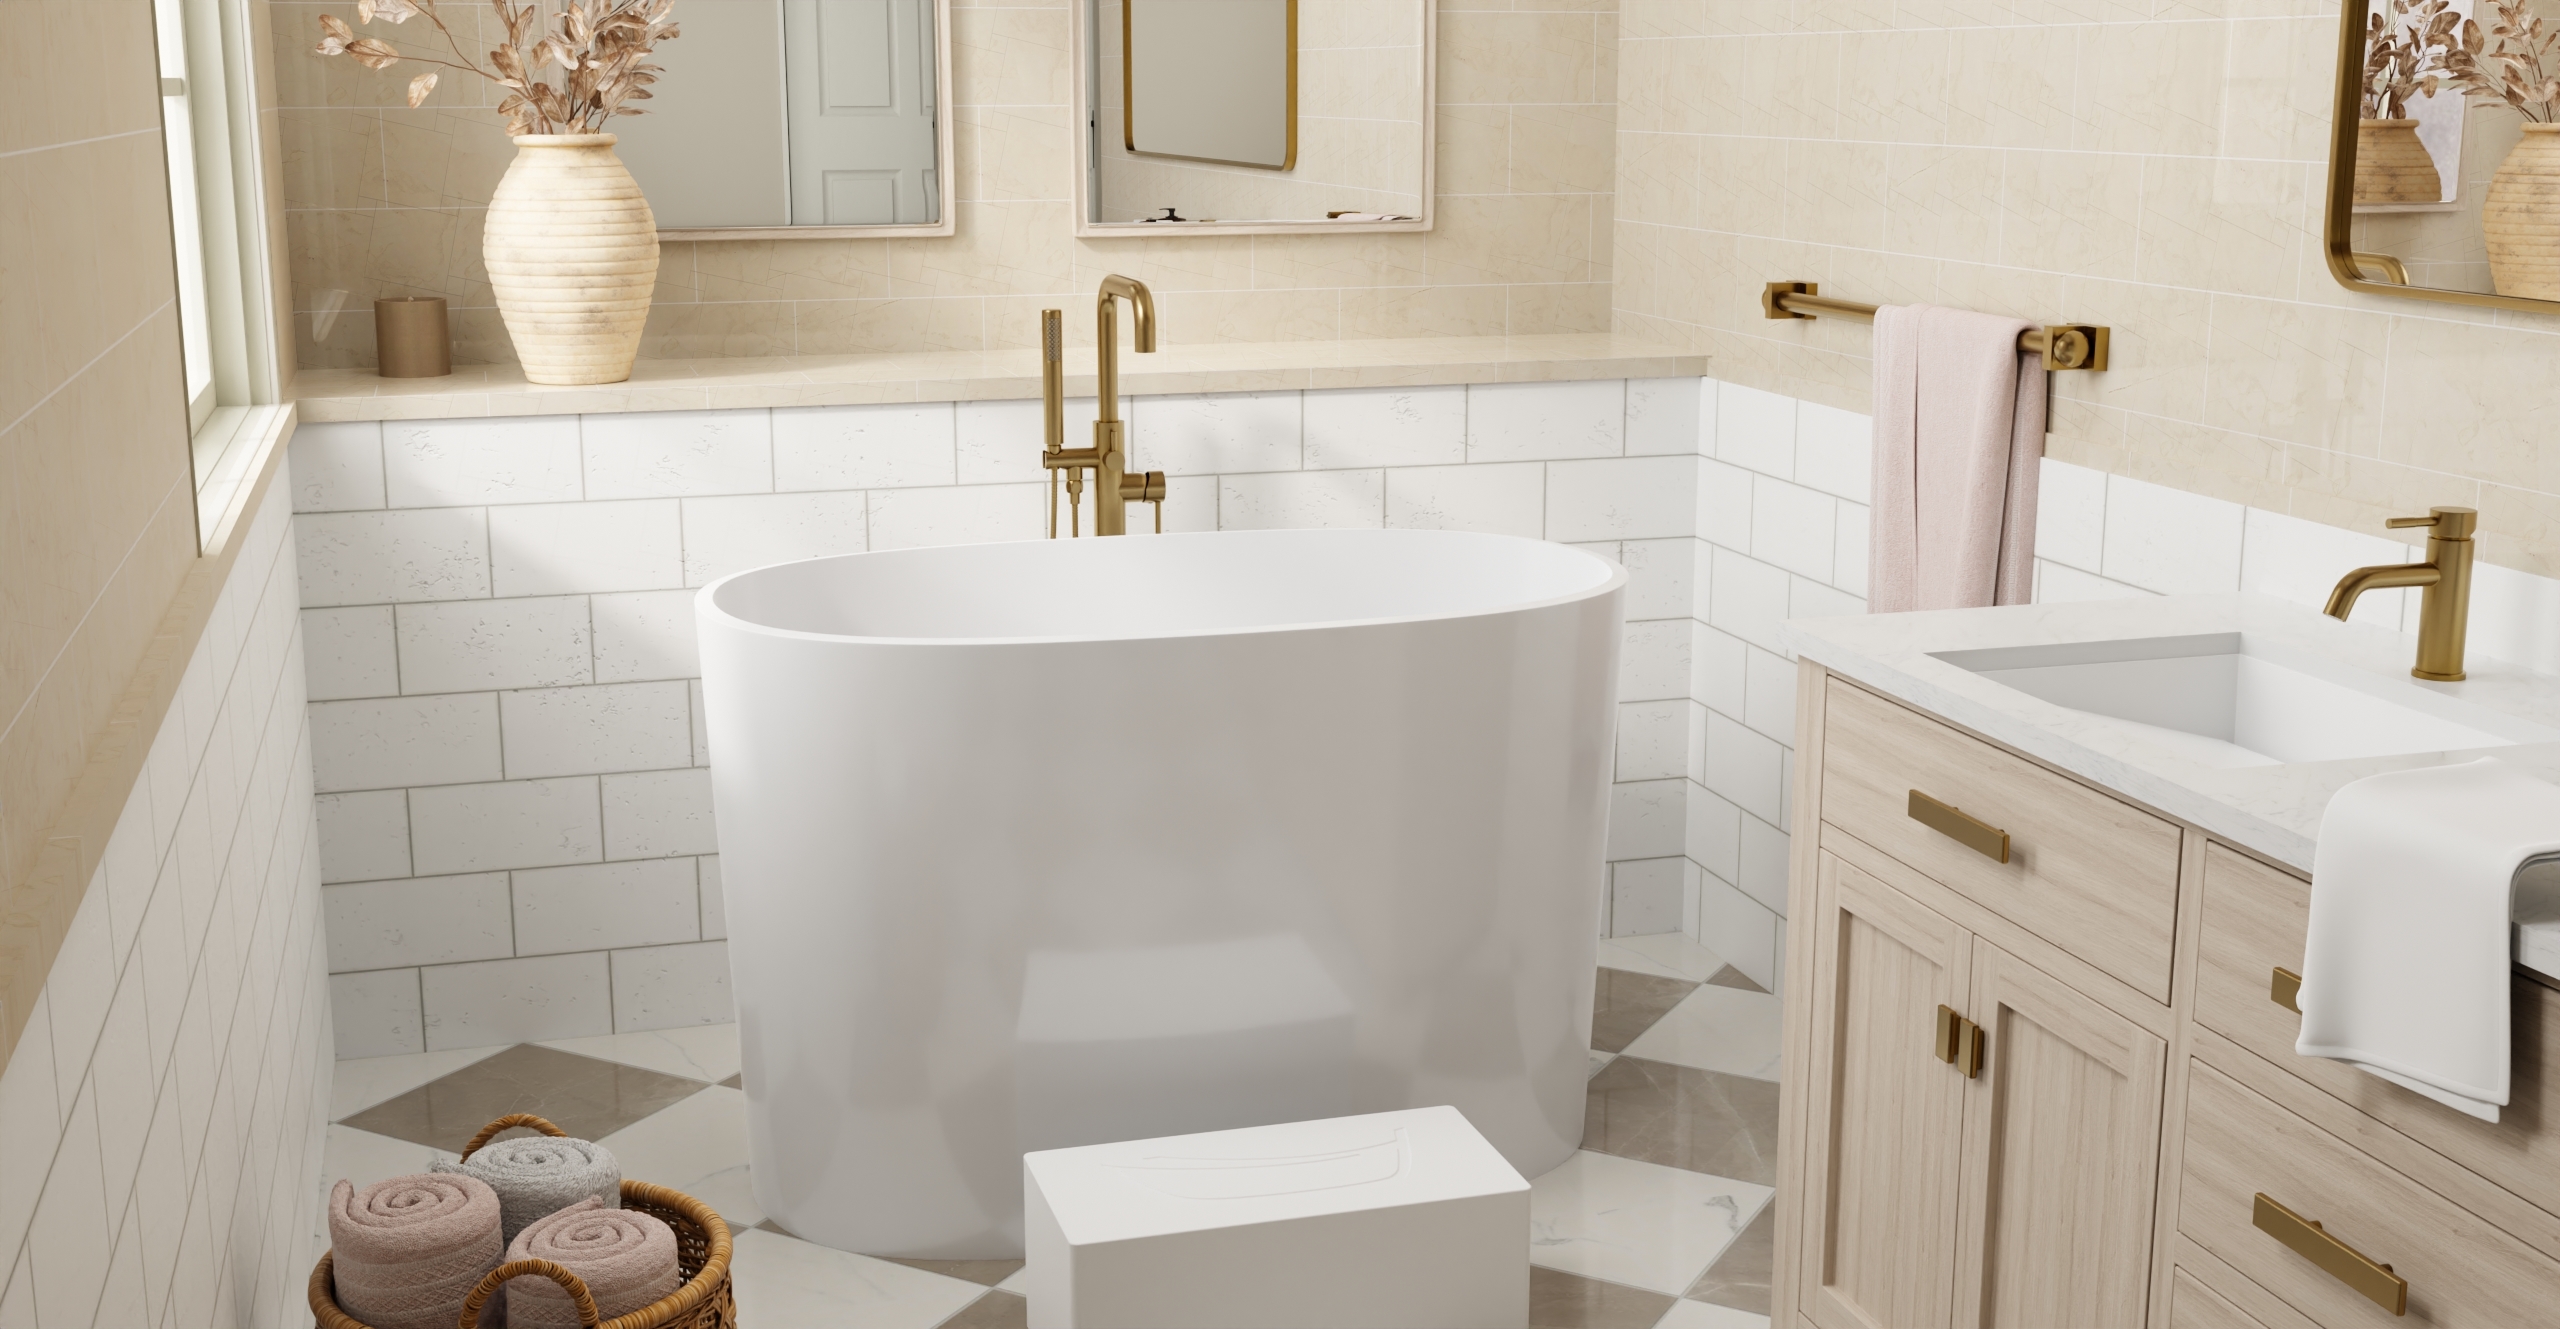
A freestanding tub can be placed in various locations as long as the plumbing rough-in supports it. Center placement gives you easy access from all sides and makes the tub a visual focal point. Against a wall works too and simplifies the faucet installation. Leave at least 6 inches between the tub and any wall for cleaning access and to prevent moisture buildup.
Allow at least 6 inches of clearance between the outside edge of the tub and the finished wall. This gives you room to clean behind the tub and prevents moisture from getting trapped, which can lead to mold growth on the wall surface.
Yes, but verify your floor’s load capacity first. A filled tub with a bather can weigh 700 to 900 lbs concentrated in a 30 to 35 square foot area. Current building codes require 40 lbs per square foot live load, which is usually sufficient, but older homes with original framing may need joist reinforcement. Have a structural engineer check before proceeding.
Yes. The most common approach is a ceiling-mounted or wall-mounted shower head with a curtain rod or glass panel to contain splash. You’ll need a shower diverter valve and appropriate waterproofing in the surrounding area. Keep in mind that freestanding tubs don’t have walls to contain water like an alcove tub does, so splash management is important.
Porcelain tile, luxury vinyl plank (LVP), and sealed natural stone all work well. These materials are water-resistant, structurally stable, and won’t warp or swell from moisture exposure. Avoid untreated hardwood and standard laminate, as both are vulnerable to water damage over time.
It depends on your local jurisdiction. If you’re replacing an existing tub in the same location with no plumbing modifications, most areas don’t require a permit. If you’re running new drain lines, moving plumbing, or adding supply lines for a new faucet, many jurisdictions require a plumbing permit. Check with your local building department before starting work.
<3>How long does the installation take?
For a straightforward replacement where the drain rough-in is already in place, plan for 3 to 5 hours. If you need to modify plumbing or adjust the floor, add another 2 to 4 hours. First-time installers should budget a full day.
If your tub is on an upper floor, yes. An access panel in the ceiling below (or in an adjacent wall) gives you a way to reach the drain connections for future maintenance or repairs without tearing out the floor. Install a removable access panel (12×12 inches minimum) directly below or adjacent to the P-trap location.
Browse our freestanding bathtub collection — every Badeloft tub ships with a compatible EZ drop-in drain and includes free shipping to the contiguous US. Not sure which model fits your bathroom? Our buying guide walks you through sizes, shapes, and materials.
Need the short version? Download our free installation checklist (PDF) and bring it with you on installation day.

Eric is the founder and president of Badeloft USA. He has been the president of Badeloft’s US division for over ten years and oversees all marketing and branding aspects of Badeloftusa.com.
His expertise lies in small business development, sales, and home and bathroom industry trends and information.
Contact us with any business related inquiries.
Badeloft is dedicated to helping homeowners make informed decisions about their bathrooms. We adhere to strict editorial guidelines to ensure our content is accurate, trustworthy, and useful.
Request free stone resin and stainless steel material samples. Delivered to your door.
Choosing the right bathtub drain stopper is essential for creating a comfortable and functional bathing experience. With over 20 common
A soaking tub is defined by one thing: depth. Where a standard alcove tub sits around 14 inches deep, a

Spring is when most bathroom remodels get serious. The weather breaks, contractors open up, and that upgrade you have been
A Japanese soaking tub, known traditionally as an ofuro, is designed for one purpose: full-body immersion. Unlike Western bathtubs built
Request your free material sample below. By submitting, you agree to receive occasional product updates and offers from Badeloft. Unsubscribe anytime.
"*" indicates required fields