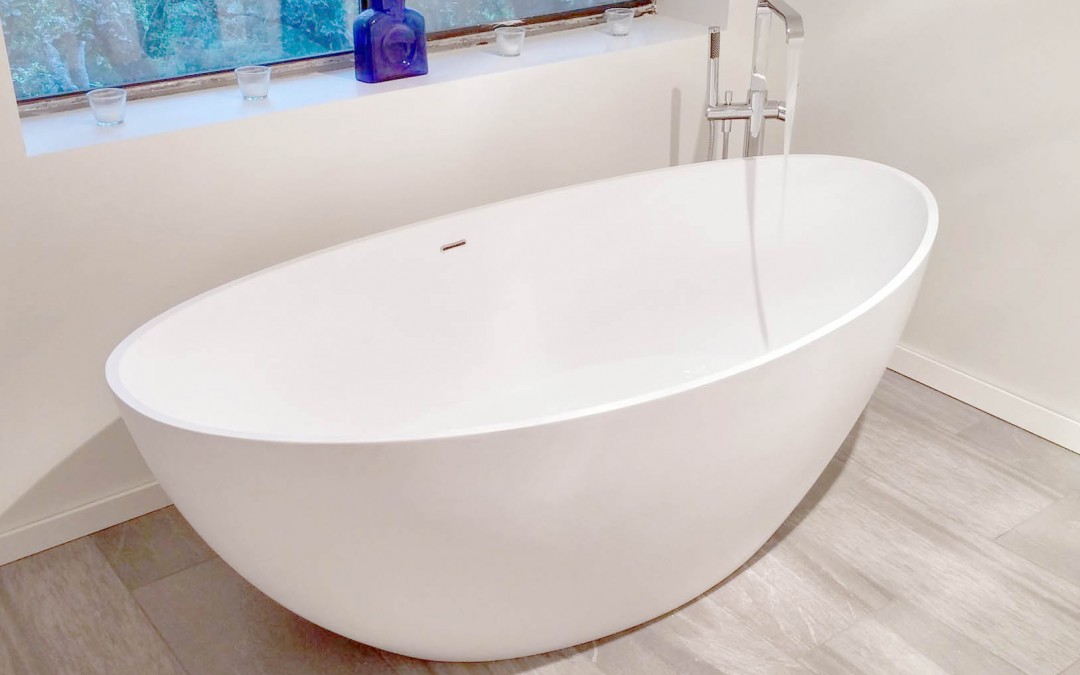
How to Install a Freestanding Bathtub: Step-by-Step Installation Guide
Installing a freestanding bathtub is a project most homeowners with basic plumbing experience can handle in a single day. The
The successful removal of a bathtub is an exercise in logistical planning and risk management, not merely a test of physical strength. The outcome of the project is largely determined before any physical work commences. A methodical approach, beginning with meticulous planning and preparation, is paramount to ensuring the safety of the individual, the integrity of the property, and the efficiency of the operation.
The initial planning phase is the most critical stage of the entire process. The act of measurement serves as a primary diagnostic tool, defining the project’s scope, required tools, budget, and labor. A failure to plan adequately is the most common precursor to property damage and personal injury, as it often forces an improvised, brute-force solution when unforeseen obstacles are encountered.
The first step is to create a scaled floorplan of the bathroom and the complete exit route. This involves several precise actions:
Record the bathtub’s exact length, width, and height. For freestanding tubs, this includes the outermost points of any feet or decorative rims.2
Document the width of every doorway, hallway, and the turning radius of any corners along the planned exit path.4 Special attention must be paid to the narrowest point, as this will be the limiting factor.
Proactively identify all fixtures that must be removed to create sufficient working space. This typically includes the toilet and vanity in a small bathroom, as well as removing doors from their hinges. This is not a contingent step but a necessary preparatory action.
Use the measurements to simulate the move on paper, solving logistical challenges such as pivots through doorways and turns in hallways before the heavy lifting begins. This process reveals whether the tub must be turned on its side or end to navigate the path, a critical detail for the transport phase.
Bathtub removal is an inherently messy and potentially destructive process. Protecting the surrounding area is a non-negotiable prerequisite to any demolition or disconnection work.
Lay down heavy-duty drop cloths or plastic sheeting on all floors along the entire exit path to protect against scratches, water, and debris. For particularly heavy bathtubs, such as those made of cast iron or stone resin, placing sheets of ½-inch plywood over the drop cloths is essential. This distributes the concentrated weight from the tub’s feet or the wheels of a dolly, preventing dents, cracks in tile, or damage to the subfloor.
Any fixtures that are not being removed, such as sinks, mirrors, or countertops, should be covered with plastic sheeting or blankets to shield them from dust and flying debris generated during demolition.
The selection of tools is dictated by an early and critical strategic decision: whether the objective is to carefully disassemble the installation to preserve the bathtub and its surroundings, or to perform a controlled demolition for efficient removal and disposal. This choice is informed by the tub’s material, its condition, and its potential resale or reuse value. A vintage, salvageable cast iron tub necessitates a disassembly approach, whereas a cracked, standard-issue acrylic tub is a candidate for demolition. This decision establishes a causal chain that influences tool selection, safety protocols, and the final disposal method.
Personal Protective Equipment (PPE) is the most critical component of the toolkit. It is not optional but essential for mitigating specific, predictable hazards associated with this work.
The following table provides a comprehensive checklist of the tools and materials required for the project, categorized by their function.
| Category | Tool/Material | Purpose |
| Safety | Work Gloves, Safety Goggles, Dust Mask, Steel-Toed Boots | Personal protection from cuts, impacts, dust, and crushing injuries. |
| Plumbing | Adjustable Wrench, Pipe Wrench, Channel-Lock Pliers | Disconnecting water supply lines, faucet hardware, and drain pipes. |
| Tub Drain Wrench (Dumbbell Wrench) | Specifically designed to engage and unscrew the bathtub drain flange. | |
| Screwdriver Set (Phillips & Flat-Head) | Removing faucet handles, overflow plates, and other fixture screws. | |
| Demolition & Detachment | Utility Knife / Razor Blade | Cutting caulk seals around the tub; scoring drywall or wall panels. |
| Pry Bar | Prying the tub away from walls; removing nails securing the tub flange to studs. | |
| Hammer & Chisel | Chipping away tile surrounding the tub; breaking stubborn drain flanges. | |
| Reciprocating Saw (with demolition blades) | Cutting through acrylic/fiberglass tubs, wall materials, and sometimes drain pipes. | |
| Sledgehammer (16-pound recommended) | Breaking cast iron or enameled steel tubs into manageable pieces. | |
| Transport | Furniture Dolly / Appliance Dolly | Moving the tub across flat surfaces (furniture dolly) or up/down stairs (appliance dolly). |
| Moving Straps (e.g., Shoulder Dolly) | Using leverage to lift and carry heavy tubs, freeing hands for stabilization. | |
| Moving Blankets | Protecting the tub and home surfaces from scratches and impacts during transport. | |
| Site Prep & Cleanup | Drop Cloths / Plastic Sheeting | Protecting floors and fixtures from water, dust, and debris. |
| Plywood Sheets | Distributing the weight of heavy tubs to protect floors from damage. | |
| Buckets & Sponges | Catching residual water from drain lines; general cleanup. | |
| Shop Vacuum | Efficiently cleaning up fine dust and small debris after removal. |
A crucial decision is whether to undertake the move personally or to hire professional movers. While a DIY approach is often perceived as more cost-effective, the expense of renting specialized equipment for a complex move can narrow the financial gap, especially when factoring in the liability for potential damage and injury that professionals assume.
| Item/Service | DIY Cost (Rental/Purchase) | Professional Cost (Service Fee) | Key Considerations |
| Labor | $0 (personal time and effort) | $80 – $100 per hour (2 movers) | Professionals are experienced, insured, and work efficiently. DIY requires at least one strong partner. |
| Appliance Dolly | $20 – $30 per day | Included in service | Essential for moving heavy tubs, especially on stairs. |
| Powered Stair-Climbing Dolly | $115 – $160 per day | Included in service (specialty movers) | Highly recommended for heavy tubs on stairs to minimize risk of injury and damage. |
| Moving Blankets/Pads | $9 – $19 per pad (purchase) | Included in service | Necessary for protecting both the tub and the home’s surfaces. |
| Liability for Damage | Full personal liability | Covered by mover’s insurance | The cost of repairing a damaged wall, floor, or the tub itself can exceed the cost of hiring movers. |

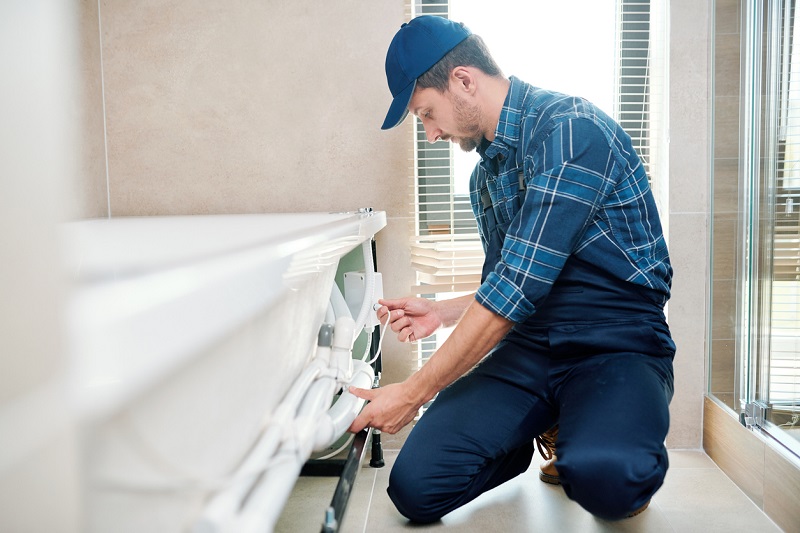
This phase requires a methodical, sequential approach to safely isolate the bathtub from the home’s plumbing and structural systems. Rushing these steps is the primary cause of water damage and complicates the removal process.
Before any tool touches a fixture, the water and electrical supplies must be completely shut off.
Failure to perform this step correctly will result in flooding. There is a clear hierarchy for locating the shut-off valve. The ideal scenario is a dedicated shut-off valve for the bathtub, often found behind an access panel in the wall behind the faucet or in an adjacent closet. If no such panel exists, the next location to check is the basement or crawlspace directly beneath the bathroom. In many cases, particularly in older homes, neither of these options will be present, necessitating the use of the main water shut-off valve for the entire house. Using the main shut-off places the entire household without water, creating significant time pressure that can lead to rushed work and mistakes.
Identify the valve type. A ball valve has a lever handle; a 90-degree turn (from parallel to perpendicular with the pipe) shuts off the water. A gate valve has a round, spigot-like handle; it must be turned clockwise until it stops.
Once the water is off, open the tub’s faucet fully to relieve any remaining pressure and drain the water from the supply lines.
For any bathtub with an electric motor, such as a whirlpool or jetted tub, it is imperative to locate the corresponding circuit breaker in the home’s main electrical panel and switch it to the “OFF” position. This is a critical, life-saving step that prevents the risk of electrocution.
With the utilities isolated, the visible hardware can be removed.
These are typically secured by a small set screw, which may be hidden under a decorative cap. Loosen the screw to remove the handle.
Check the underside of the spout for a set screw; if present, loosen it with a hex key and pull the spout off. If no set screw is visible, the spout is threaded and can be unscrewed by turning it counter-clockwise, possibly with the aid of channel-lock pliers (use a rag to protect the finish).
The shower head simply unscrews from the threaded shower arm extending from the wall.
The drain assembly is often the most challenging component to remove due to age, corrosion, and hidden mechanics. This process can be likened to “plumbing archaeology,” where the condition of decades-old parts dictates the difficulty and required tools. A modern drain may be a simple task, but an old, corroded one can become a complex sub-project requiring destructive methods.
There are several common types of stoppers, each with a unique removal method.
With the stopper removed, the main drain body, or flange, must be unscrewed from the drain shoe below the tub.
The final plumbing step is to disconnect the entire waste and overflow unit from the main drain line.
The final step before physically moving the tub is to sever the caulk bead that seals it to the wall and floor. It is critical to remove all old caulk, as new sealant will not adhere to it properly.
Use a utility knife or razor blade to score both the top and bottom edges of the caulk bead. Follow this by scraping the caulk out with a plastic putty knife or a dedicated caulk removal tool. Plastic tools are strongly recommended to avoid scratching the surface of acrylic or fiberglass tubs.
For particularly stubborn or old caulk, applying gentle heat with a heat gun or hairdryer can soften it significantly, making it easier to scrape away. Chemical caulk removers are also effective at dissolving the bond between the caulk and the tub surface.
After all the caulk has been removed, wipe the area with a cloth dampened with rubbing alcohol to remove any remaining residue and ensure a clean surface.
The material from which a bathtub is constructed is its “genetic code”—it dictates the object’s weight, the tools required for its removal, the necessary manpower, the appropriate transport equipment, and the correct disposal method. Misidentifying the material can lead to catastrophic failure, such as attempting to lift a 400-pound enameled steel tub under the assumption that it is a 70-pound fiberglass unit.
Correctly identifying the tub’s material is the most critical decision point of the entire project.
A strong magnet is the most definitive test. It will adhere firmly to cast iron and enameled steel but will not stick to acrylic, fiberglass, or stone resin.
Gently press on the apron (the front side wall) of the tub. Fiberglass will have a noticeable amount of flex and may produce a hollow sound when tapped. Acrylic is much more rigid but may still have minimal flex. Cast iron, enameled steel, and stone resin will be completely rigid and unyielding.
Acrylic has a deep, uniform gloss that is consistent throughout the material. Fiberglass is coated with a gelcoat finish that may appear duller or show signs of fading and wear. Enameled steel and cast iron have a very hard, glass-like porcelain finish.
Cast iron is the heaviest common material, with tubs weighing from 300 to over 500 pounds. Enameled steel is a lighter but still substantial alternative, typically weighing between 70 and 150 pounds. Both have a brittle porcelain enamel coating that can shatter into extremely sharp shards when broken.
These tubs are secured to the wall studs by an integrated nailing flange. To access it, the surrounding wall material must be removed. For tiled walls, the bottom row of tiles must be carefully broken away with a hammer and chisel. For drywall or panel surrounds, cut the material approximately 6 inches above the tub rim with a reciprocating saw, taking care to avoid cutting into studs or plumbing.
With the flange exposed, use a pry bar and hammer or a screwdriver to remove all the nails or screws fastening the tub to the wall studs.
This approach is reserved for tubs being salvaged or reused. It is a high-risk maneuver that requires a minimum of two to three strong individuals. The team must use pry bars to slowly and evenly work the tub away from the back wall, lifting and sliding it out of the alcove.
For most DIY projects, this is the safest and most logical strategy. It transforms a dangerous, multi-person lift into a manageable, single-person cleanup task by trading the tub’s intrinsic value for a massive reduction in risk.
Before starting, cover the tub completely with a heavy blanket or tarp to contain flying porcelain shards. Lay plywood on the floor to protect it from falling pieces. All personnel must wear full PPE, including safety goggles and hearing protection, as striking the tub is extremely loud.
Using a 16-pound sledgehammer, strike the tub firmly. Begin on the apron and sides, then work into the basin. The cast iron will shatter into manageable pieces that can be safely carried out.

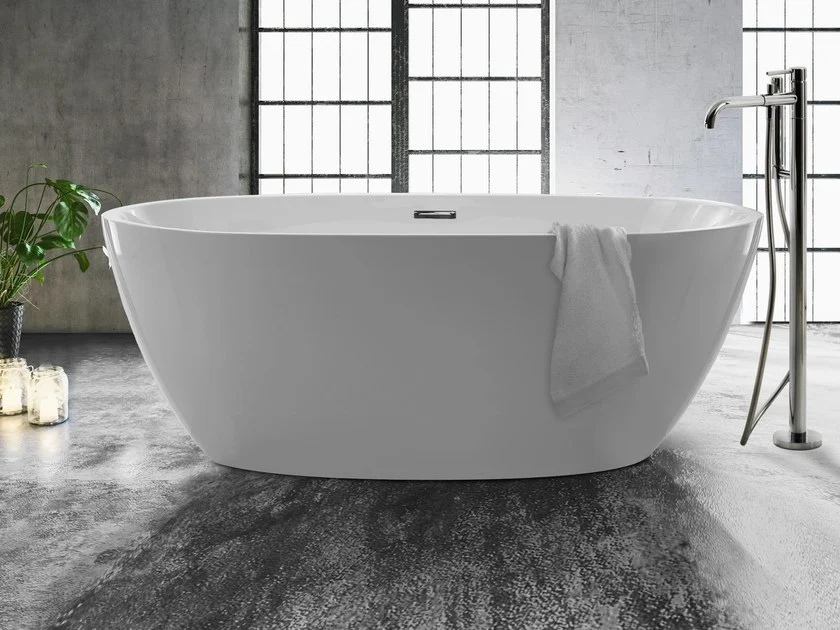
These tubs are significantly lighter and easier to handle. Fiberglass tubs typically weigh 30–70 pounds, while the more durable acrylic tubs weigh 70–100+ pounds. They are more flexible than metal tubs and are best removed by cutting rather than smashing.
The primary strategy for these materials is division. After exposing and detaching the nailing flange from the wall studs, use a reciprocating saw equipped with a demolition or all-purpose blade. Cut the tub and its integrated surround into several smaller, manageable sections. This method allows for easy removal from even the most confined bathrooms and can often be completed by a single person.
Stone resin tubs combine the extreme weight of cast iron (300 to over 900 pounds) with a high-end, solid-surface finish that must be preserved. Destruction is not an option.
Removing a stone resin tub is a specialized task focused on leverage, meticulous planning, and significant manpower.
This is a job for a team of at least four to six people, and professional assistance is strongly recommended.
The key is to avoid direct lifting from the floor. Instead, the tub should be raised incrementally. One side is lifted slightly, and blocks of wood (e.g., 2x6s) are slid underneath. This process is repeated on all sides, building up a stable platform of blocks until the tub is high enough to be moved onto a dolly or lifted by a team. Heavy-duty suction cups can provide essential handholds on the tub’s smooth, heavy surfaces.
The following table provides a comparative overview of the strategic considerations for each material type.
| Material Type | Average Weight (lbs) | Key Characteristics | Primary Removal Method | Transport Difficulty | Disposal Path |
| Cast Iron | 300 – 500+ | Extremely heavy, rigid, brittle enamel finish. | Demolition (Sledgehammer) | Very High | Scrap Metal Recycling |
| Enameled Steel | 70 – 150 | Lighter than cast iron, rigid, brittle enamel finish. | Demolition or Team Lift | High | Scrap Metal Recycling |
| Acrylic | 70 – 100+ | Lightweight, rigid, scratch-resistant, uniform color. | Cutting (Reciprocating Saw) | Low | Landfill/Waste Transfer |
| Fiberglass | 30 – 70 | Very lightweight, flexible, prone to scratching/fading. | Cutting (Reciprocating Saw) | Very Low | Landfill/Waste Transfer |
| Stone Resin | 300 – 900+ | Extremely heavy, solid surface, must be preserved. | Team Lift with Blocking/Levers | Extreme | Construction Debris Landfill |
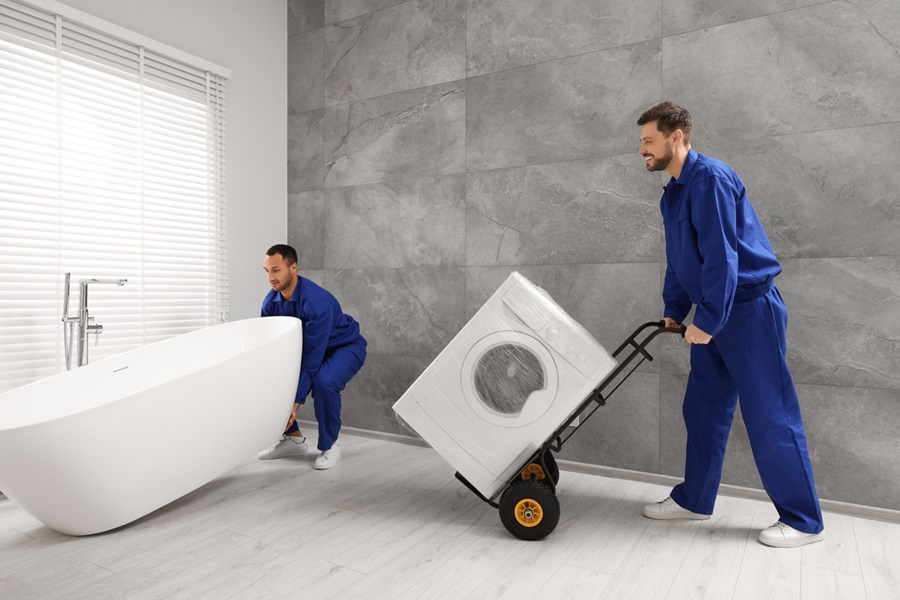
Transporting a detached bathtub is a challenge in applied physics. Success depends less on raw strength and more on the intelligent selection and use of tools that multiply force and reduce risk. These tools convert a direct fight against gravity and friction into a more manageable task of rolling and balancing.
The type of dolly must match the environment.
A four-wheel furniture dolly is a low-profile platform ideal for moving a tub across flat, level surfaces. Its swivel casters allow for easy maneuvering.
A two-wheel appliance dolly is a tall, L-shaped hand truck essential for vertical maneuvering and navigating stairs. It features built-in straps to secure the load and provides better leverage for tilting and balancing.
With a partner, lift one end of the tub and slide the dolly underneath, ensuring the load is centered for stability. Securely fasten the tub to the dolly using the integrated straps before attempting to move it.
These systems use the principle of leverage to transfer the load from weaker muscle groups (arms, lower back) to stronger ones (legs, shoulders), making the object feel significantly lighter.
Adherence to the manufacturer’s instructions is critical for safety and effectiveness. Each person dons their harness. The main lifting strap is centered under the tub. Each person then threads the strap through their harness buckle and adjusts the length to allow for a lift of only a few inches off the ground. Both partners must lift in unison, using their legs while keeping their backs straight.
Standard shoulder straps are generally not recommended for use on stairs. The angle of the staircase causes the vast majority of the weight to shift onto the lower person, creating a dangerous and unstable situation.
When multiple people move a heavy object, they function as a single dynamic system. The “nervous system” of this temporary human-machine unit is communication. A lack of clear, constant communication is the single greatest point of failure in a team lift, as an uncoordinated movement by one person can catastrophically shift the entire load, leading to a dropped object and severe injury.
Moving a large, rigid object through the confined geometry of a home is a three-dimensional puzzle. Success requires visualizing the tub’s shape in relation to its environment and planning pivots and orientation changes well in advance.
The most common solution for navigating a narrow doorway or hallway is to change the tub’s orientation. By turning the tub vertically onto its side or end, its height becomes its new “width,” which is often significantly less than its original width, allowing it to pass through the opening. If this is still insufficient, the next step is to remove the door from its hinges. For a final, crucial few inches of clearance, the door trim and the entire door frame can be carefully pried off the wall. For tight corners, the tub may need to be “walked” around the turn while standing on its end.
As established in the planning phase, creating adequate working space is paramount. The toilet and vanity should be removed from the bathroom before attempting to remove the old tub or install a new one. The pivot out of the alcove must be planned. Typically, this involves lifting the drain end of the tub up and away from the wall first, then sliding it out of the alcove at an angle.
Stairs represent the most hazardous part of any bathtub move. They introduce gravity as a powerful and dangerous variable, acting as a “force multiplier” that can turn a loss of control into a catastrophic event. On a flat surface, the primary opposing force is friction; on stairs, the team is actively fighting gravity. The person positioned at the bottom of the stairs bears a disproportionately large share of the weight and is in the most vulnerable position. For these reasons, this is the phase where professional-grade equipment is recommended.
This method should only be attempted with lighter tubs and a strong, well-coordinated team. The tub must be securely strapped to the dolly. One person positions themselves above the dolly to pull and guide, while one or two people are below to lift and support the weight. The team moves one step at a time with constant, clear communication.
For any heavy tub, this specialized tool is the safest and most effective option. These dollies use a motorized lifting mechanism controlled by the operator, who primarily focuses on guiding and balancing the load. The machine does the heavy lifting, dramatically reducing the risk of injury and property damage. While expensive to purchase, they are available for daily rental.
In some situations, a system of plywood ramps can be constructed over the staircase, and a winch can be used to pull the tub up the incline. This is an advanced technique that requires a professional to execute safely.
The project concludes not when the old tub is removed from the bathroom, but when the space is properly prepared for the new installation and the old unit has been responsibly disposed of.
Once the tub is out, the entire area must be thoroughly cleaned. Sweep and vacuum all debris, including broken tile, old caulk, nails, and screws. With the area cleared, conduct a careful inspection of the exposed subfloor and wall studs for any signs of water damage, rot, or mold that may have been concealed by the old tub.
The preparation of the subfloor is the first and most critical step of the new bathtub installation. Placing a new tub on a damaged or un-level surface will lead to a cascade of future problems, including improper drainage, a rocking or creaking tub, and a compromised waterproof seal, ultimately leading to the failure of the entire installation.
The final step is the responsible disposal of the old tub, a process dictated by its material composition. This is not merely about “getting rid of it,” but about fulfilling an environmental and, in some cases, economic responsibility.
These materials are valuable ferrous metals and should not be sent to a landfill. They are highly recyclable. Contact local scrap metal recycling facilities, many of which will accept them and may offer payment based on weight. The broken pieces will need to be transported to the facility.
These plastic-based tubs are generally not accepted by municipal recycling programs and are treated as construction and demolition debris. If the tub is in good, usable condition, consider donating it to a building material reuse center like Habitat for Humanity ReStore. Otherwise, the pieces must be transported to a landfill or a waste transfer station. Contact the local waste hauler for specific guidelines on size and weight restrictions.
As an inert, cured composite material, stone resin is not recyclable like metal. It is treated as non-hazardous construction debris and must be disposed of at a landfill or transfer station that accepts such materials. Due to its extreme weight, it is imperative to contact the facility beforehand to confirm they can accept it and to plan for unloading.
Removing a bathtub is a complex process that depends on proper preparation. An understanding of the task reveals that the most critical factors are not strength, but rather meticulous planning, accurate material identification, and the strategic application of appropriate tools and techniques.
The process begins with a diagnostic measurement phase, which defines the entire operational plan. This is followed by a strategic decision—to preserve or destroy the tub—which dictates the required tools and safety protocols. The material of the tub itself acts as a blueprint, prescribing the specific methods for detachment, the level of manpower required, and the ultimate path for responsible disposal. Transporting the tub is an exercise in applied physics, where dollies and straps serve as force multipliers to manage weight and mitigate risk, guided by clear team communication to prevent catastrophic failure.
Ultimately, a successful bathtub removal requires you to operate as a logistician, plumber, demolition expert, and mover, adapting your strategy to the unique geometric and material realities of your specific situation. By prioritizing planning, safety, and proper techniques over brute force, a bathtub can be removed safely and effectively.

Eric is the founder and president of Badeloft USA. He has been the president of Badeloft’s US division for over ten years and oversees all marketing and branding aspects of Badeloftusa.com.
His expertise lies in small business development, sales, and home and bathroom industry trends and information.
Contact us with any business related inquiries.
Badeloft is dedicated to helping homeowners make informed decisions about their bathrooms. We adhere to strict editorial guidelines to ensure our content is accurate, trustworthy, and useful.
Request free stone resin and stainless steel material samples. Delivered to your door.
Installing a freestanding bathtub is a project most homeowners with basic plumbing experience can handle in a single day. The
The modern residential landscape is currently undergoing a profound architectural and psychological shift, moving away from the utilitarian “all-in-one” bathroom
Acrylic bathtubs have become one of the most widely used materials in modern bathrooms, offering a balance of affordability, comfort,
When you’re shopping for a freestanding bathtub, the material matters just as much as the shape or size. It changes
Request your free material sample below. By submitting, you agree to receive occasional product updates and offers from Badeloft. Unsubscribe anytime.
"*" indicates required fields