Stone Resin vs. Acrylic Tubs: Which Material Is Right for You?
When you’re shopping for a freestanding bathtub, the material matters just as much as the shape or size. It changes
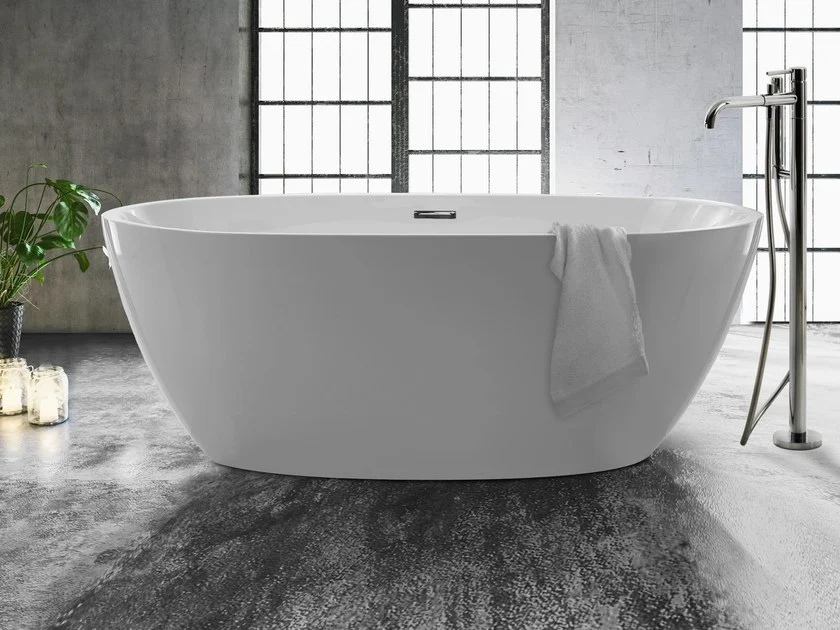
Choosing the correct drain assembly for your bathtub is more than a finishing touch; it’s central to your bathing experience. A properly selected kit ensures that water drains efficiently, fits seamlessly with your tub and plumbing, complements your bathroom’s décor, and makes cleaning a breeze. In 2025 the variety of assemblies on the market—from durable brass kits to sleek minimalist stoppers—means homeowners and renovators have more options than ever. Whether you’re replacing a tired drain or outfitting a brand‑new tub, understanding the components, styles, materials, and measurements involved will help you make a decision that lasts for years. This guide combines practical steps with current design trends to help you choose a drain assembly confidently.
A drain assembly is the system of parts that manages how water leaves your bathtub and prevents it from overflowing. When you remove the old drain from a tub or purchase a new tub, you’re not just buying a single metal circle for the drain hole—you’re purchasing a series of interlocking parts that must work together. Because most of these components sit behind the tub wall or under the floor, it’s essential to know what you’re buying and why it matters.
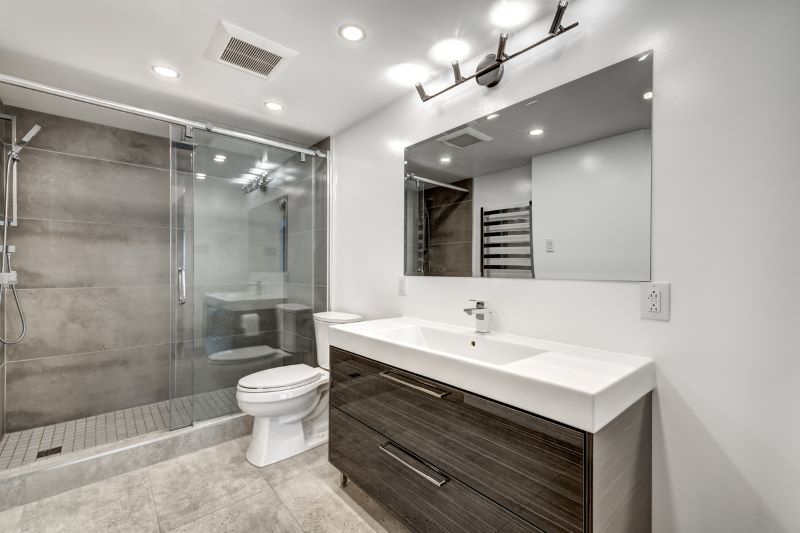
A bathtub drain may look simple from the outside, but it’s made up of several parts that work together to keep water flowing smoothly and prevent leaks. Below is a breakdown of the main components and how each one functions.
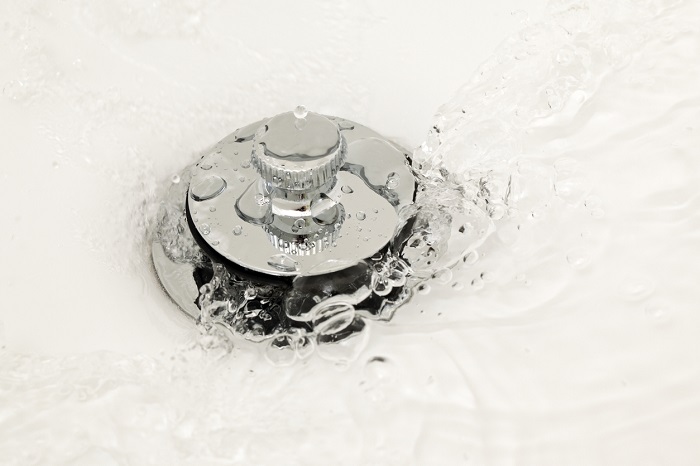
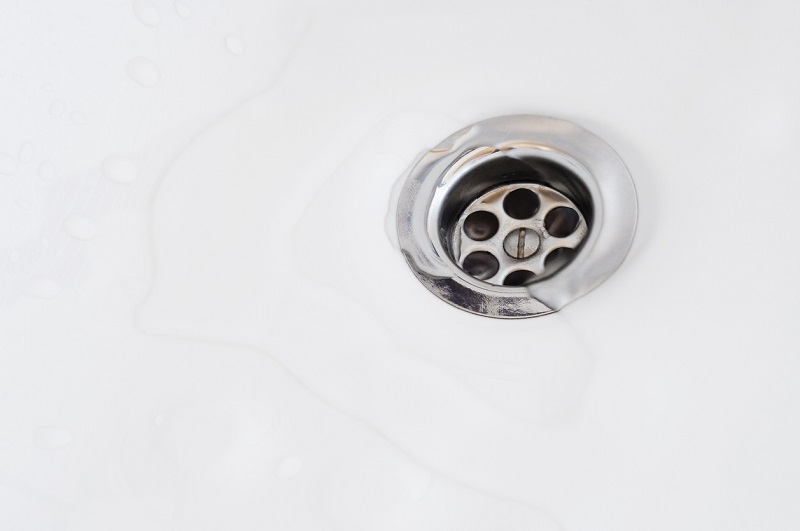
The drain flange is the visible ring at the bottom of the tub. This ring screws or bolts into a fitting underneath the tub, creating the opening through which water drains. Attached to the flange is the stopper, which can be engaged or disengaged to seal the drain and hold water in the tub. Stoppers come in many forms—twist mechanisms, toe‑touch plungers, or lift‑and‑turn styles—but they all serve the same purpose: to seal water inside when you bathe and release it when you’re finished.
Directly beneath the drain flange sits the tub shoe, a curved or straight elbow fitting that connects the drain opening to the waste pipe under the floor. The tub shoe is responsible for directing water from the tub into your home’s plumbing system. Because it sits out of sight, many homeowners don’t think about it; however, the shoe must be sized correctly and made of a material compatible with your existing pipes (usually PVC, ABS plastic, or brass) to prevent leaks and clogging.
Further down, the waste tee links the drain from the tub and the overflow from the side of the tub into one outlet pipe. This “T” shaped fitting ensures that if water reaches the overflow level, it bypasses the drain and flows directly into the waste pipe. From the waste tee, a tailpiece runs vertically or horizontally to meet your home’s main waste line. This combined pathway must be properly aligned to ensure efficient drainage and prevent unpleasant odors from coming back up the drain.
Every bathtub should include an overflow: the circular opening near the top of the tub that prevents spills by diverting water into the waste line if the water level gets too high. The overflow body sits behind the tub wall and is connected to the waste tee. On the front, you’ll see an overflow cover or plate. In simple configurations the plate is just a decorative cover with an opening; in more complex systems, it may house a lever for the drain stopper. Matching the finish of the overflow plate to the drain flange ensures a cohesive look.
Sealing water properly requires rubber or foam gaskets at each connection point. Gaskets and washers sit between the tub surface and the metal fittings; they compress to form watertight seals. Over time these seals can dry out or crack, so replacing the gaskets when you replace the drain assembly is critical. New kits include appropriate gaskets for each joint to minimize the chance of leaks.
The only parts of the drain assembly you see after installation are the flange, stopper cap, and overflow plate. These trim pieces come in a variety of finishes to match your faucets and fixtures. Popular finishes in 2025 include chrome, brushed nickel, matte black, oil‑rubbed bronze, and polished brass. Choosing a finish that coordinates with the rest of your bathroom creates a unified aesthetic.
With a grasp of the components, the next step is to explore the variety of stopper mechanisms and configurations available.
Different tubs and users have different needs. Understanding the various drain mechanisms will help you pick a stopper style that suits your habits and the tub’s design. Here are the main categories you’ll encounter.
The toe‑touch, also known as push‑to‑close, is one of the most straightforward and modern designs. The stopper sits flush with the drain flange; you push down with your toe to close it and push again to pop it open. Toe‑touch stoppers are popular because they are sleek and require no hand contact. They work well in contemporary bathrooms or households where children and guests appreciate a simple, intuitive mechanism. However, the spring mechanism inside can wear out over the years, so choose a model with replaceable springs or consider this maintenance cost.
Lift‑and‑turn drains feature a small knob on top of the stopper cap. You lift the cap slightly and rotate it to open or close the drain. This style has fewer internal parts than a toe‑touch design and tends to be very reliable because there’s no spring to fail. Lift‑and‑turn stoppers look classic and work smoothly but require users to bend down and twist the knob. They suit households that prefer a tactile, mechanical feel and are willing to perform occasional tightening to keep the cap from loosening.
Push‑pull designs are closely related to lift‑and‑turn. You pull the stopper up to open the drain and push it down to close. These stoppers have a straightforward motion with minimal complexity, making them durable and easy to service. However, some bathers find the action less intuitive than push‑to‑close or lift‑and‑turn options. They are well suited to bathrooms where longevity and cost‑effectiveness are priorities.
Trip‑lever drains incorporate a lever mounted on the overflow plate. When you move the lever, it lifts or lowers an internal plunger inside the drain pipe. The plunger blocks or opens the drain without a visible stopper in the tub floor. These systems offer a classic look and a clear on/off indication; you can see the lever position at a glance. The downside is that hair and debris can accumulate around the internal linkage, making maintenance slightly more involved. Trip‑lever assemblies are ideal for vintage‑style tubs or situations where you don’t want a cap protruding from the drain.
More advanced drain kits use a cable connected to a knob on the overflow plate. Turning the knob actuates a cable that opens or closes the stopper in the drain. This system gives you flexibility in routing and alignment, which is particularly useful for freestanding tubs where space is tight behind the tub wall. Cable systems provide a smooth operation and contemporary look, but they have more moving parts and can be more expensive. If you prioritize a minimalist appearance and convenient operation, a cable‑operated kit may be worth the investment.
Clawfoot and freestanding heritage tubs often require exposed drain assemblies. In these kits the waste and overflow pipes run outside the tub and are visible, becoming part of the décor. Exposed kits are typically made from solid brass or finished metal and may feature ornate details. Because they are on display, choose a finish and style that complements the tub’s vintage character. Exposed kits are among the most expensive options but are essential to maintain the classic look of clawfoot and other freestanding designs.
An old‑fashioned but effective solution, chain and plug drains use a simple rubber or metal plug attached to a chain. When you need to drain the tub, you pull the plug out. This setup is often seen in period bathrooms or where a historically authentic look is desired. Chain and plug systems are inexpensive and easy to replace, but they don’t offer the convenience of built‑in stoppers and can be more prone to losing the plug. Pair them with clawfoot tubs or vintage‑inspired installations.
For soaking tubs or whirlpool bathtubs that hold large volumes of water, waiting for the water to drain can be frustrating. High‑flow assemblies are designed with larger openings and optimized pipe paths to drain a tub quickly. These kits typically use a 2‑inch waste line instead of the standard 1.5‑inch diameter. If you have a tub that holds 70 gallons or more, or a spa tub that you want to empty swiftly, a high‑flow kit will improve your experience. Be sure to confirm that your plumbing and local codes support larger drains.
Once you know the drain types, it helps to look at the materials, finishes, and trends that define assemblies in 2025.
Design trends and building technologies evolve constantly, and 2025 introduces a few noteworthy considerations for bathtub drains.
Solid brass assemblies continue to be the gold standard. Brass is durable, resists corrosion, and can handle repeated use in busy households or rental properties. However, brass kits are more expensive and heavier to handle during installation. PVC or ABS plastic assemblies are budget‑friendly, lightweight, and easy to solvent‑weld to existing plastic piping. They work well in secondary bathrooms or guest suites where usage is lighter. Hybrid kits combine brass trim (the visible parts) with plastic waste and overflow piping, offering a balance between longevity and cost.
In 2025 finishes are bolder and more varied than a decade ago. Matte black continues its popularity in modern minimalism, while brushed brass and brushed nickel offer warmth and a soft sheen. Polished chrome remains a reliable choice for a bright, clean look, and oil‑rubbed bronze provides an antique feel. Physical vapor deposition (PVD) finishes—available in many colors—provide extra durability and resistance to scratching and cleaning chemicals. When you’re replacing a drain, choose a finish that complements your faucets and fixtures to tie the room together.
Modern soaker tubs often have higher sides and hold more water. Slotted or high‑rise overflow plates raise the waterline so you can enjoy a deeper soak without risking overflow. Some kits now include removable hair‑catching seats or easy‑clean tops that prevent clogs and make maintenance painless. When shopping for a kit in 2025, consider whether these user‑friendly additions would enhance your bathing routine.
Even with style and material options in mind, accurate measurements are the foundation for selecting an assembly that fits.
The single most important step you can take before purchasing a drain assembly is to measure your tub accurately. Incorrect measurements lead to poor fit, leaks, and frustration during installation.
Most modern bathtubs use drain openings between 1.5 and 2 inches in diameter. Overflow openings are standardized to accommodate typical tub depths. Universal fit drain assemblies are designed to accommodate a range of distances and depths: they include extendable overflow pipes and adjustable drain shoes, making them suitable for renovations or uncertain dimensions. However, older, custom, or designer tubs may have non‑standard drain sizes or unique overflow placements. Custom drains might be required for these installations, which often means higher costs and longer lead times.
To begin, remove any existing stopper and carefully measure the diameter of the opening at the tub’s bottom using a tape measure. Record the measurement to the nearest eighth of an inch. For most households this measurement will be between 1.5 and 2 inches; however, variations exist. If your tub is older or imported, take extra care to measure; some vintage or European tubs use metric or non‑standard sizes.
Next locate the overflow opening on the side of the tub. Measure the distance from the center of the overflow hole down to the center of the drain opening. This vertical distance determines how far the overflow tube needs to travel. If you can access the rough‑in plumbing behind the tub, measure the horizontal distance from the overflow to where it connects with the waste tee. Accurate alignment here prevents stress on the pipes and ensures the overflow functions properly.
Overflow depth is the vertical distance from the bottom of the tub to the center of the overflow hole. Place a ruler or tape measure at the deepest point of the tub (usually near the drain). Then measure up to the center of the overflow opening. This measurement dictates how much water your tub can hold before the overflow engages. If you choose a deep‑soak plate, ensure the depth aligns with the manufacturer’s specifications for your tub material.
The waste arm, also known as the drain shoe, runs horizontally from the bottom of the drain to the waste tee. Measure from the center of the drain opening to the point where the drain pipe meets the main plumbing. This dimension is critical if your tub sits far from the wall or if you have an offset waste line. Many adjustable kits include telescoping waste arms, but knowing the actual distance helps you confirm that the kit can be adjusted to fit.
In addition to the overflow depth, note the overall depth of your tub. Place the tape at the deepest spot and measure vertically to the top edge. This measurement influences whether a standard or high‑rise overflow is appropriate. Deeper tubs may require longer overflow tubes or slotted covers that allow a higher water line.
Finally, determine how you’ll access the plumbing during installation. Is there an access panel behind the tub? Is the tub sitting on a slab with no under‑floor access? Will you need to work through an adjacent wall? Limited access may steer you towards kits that are easier to assemble from within the tub area or that use fewer connections. If you’re unsure about space constraints, consult a plumber before purchasing.
Armed with your measurements and product knowledge, follow this logical sequence of steps to narrow your choices and identify the best kit.
Armed with measurements and an understanding of drain types, you can work through the following steps to make an informed decision.
Determine whether you have an alcove tub, drop‑in tub, freestanding tub, or clawfoot tub. Alcove tubs typically have either a left‑hand or right‑hand drain depending on where the plumbing is located when you stand facing the apron. Freestanding and modern soaking tubs often have center drains; access to plumbing is usually through the floor. Clawfoot tubs almost always require an exposed drain kit. Knowing your tub type ensures that you select a drain assembly designed to work with its particular shape and drainage location.
Check your measurements against standard sizes. In the United States most bathtubs use a nominal 1.5‑inch drain with standard threads. Shower drains are typically 2 inches and should not be confused with bathtub drains. When in doubt, bring your measurements to the hardware store or consult manufacturer specifications. Some kits are marketed as “universal” but may still require adapters if your tub has unusual dimensions.
Beyond verifying the drain opening, be sure to note the thickness of the tub floor at the drain location. Some flanges cannot clamp securely on extremely thick stone or composite tubs. Record the overflow center height and the distance between the drain and overflow centers. Adjustable kits can telescope to a range of lengths, but each product has limits. Be aware of those limits to avoid forcing a kit beyond its capacity.
Examine the material of your current waste lines. If your home uses PVC or ABS pipes, it’s easiest to install a drain assembly made of the same material so that you can solvent‑weld the connections. If your plumbing is copper or brass, choose a brass kit that can be joined using threaded or compression fittings. Using mismatched materials (for example, connecting PVC to ABS without the proper cement) can lead to leaks or code violations.
Consider how you or your family interact with the bathtub. A toe‑touch design offers hands‑free operation but may need spring replacements over time. Lift‑and‑turn or push‑pull stoppers provide longevity but require bending and twisting. Trip‑lever and cable‑operated systems keep the drain opening clear but involve hidden linkages that might need occasional cleaning. Select a stopper that matches your design preferences and your tolerance for maintenance.
The overflow plate can be more than a simple round opening. Standard round plates are reliable and familiar. Slotted or deep‑soak plates allow the tub to hold more water before draining begins; they’re popular in 2025 for soaker tubs. Integrated covers with hidden screws deliver a clean, minimalist look, but they may require specific mounting configurations. Ensure that the overflow style is compatible with your tub wall thickness and your desired water depth.
Once you know the type of stopper and the material of the waste assembly, choose a finish for the visible trim. Match the finish to your tub spout, faucets, and other hardware. If your bathroom features matte black faucets, select a matte black drain flange and overflow plate. If you’ve chosen brushed nickel for towel bars and cabinet pulls, a brushed nickel drain assembly will tie the room together. Durability should be part of your consideration as well: PVD finishes withstand daily cleaning and heavy use better than cheaper coatings.
Think about how much effort you’re willing to invest in keeping your drain assembly working smoothly. Removable stoppers make it easier to clear hair and soap buildup. Smooth‑bore tubes are less likely to accumulate debris than ribbed pipes. Complex linkages inside trip‑lever systems may require occasional disassembly for cleaning; if you prefer low‑maintenance fixtures, choose a simpler mechanism. Some modern kits include traps or baskets that catch hair while allowing water to flow, reducing clogs.
Plumbing codes vary by jurisdiction, but many require bathtubs to have an overflow for safety. If you purchase a freestanding tub without an overflow, confirm that it’s allowed in your area or that the tub meets a specific exemption. Additionally, follow the manufacturer’s installation guidelines for the drain assembly. Using plumber’s putty on natural stone, for example, can stain the material; manufacturers may recommend 100% silicone instead. Always abide by the instructions provided with your tub and drain kit to maintain warranty coverage.
Before you finalize your purchase, verify that you understand how the kit will be installed. Some kits assemble from inside the tub, threading through the drain hole; others require access from beneath or behind the tub. Make sure you have the correct sealant for your tub material—plumber’s putty for metal tubs, silicone for acrylic or stone composites. Double‑check that new gaskets are included in the kit. Never reuse old gaskets, as compressed or dry seals will inevitably leak.
| Style | How it Works | Pros | Cons | Best For |
| Toe-touch / Push-to-close | Tap stopper with your foot | Sleek, simple, easy to replace top | Spring can wear over years | Modern look, easy cleaning |
| Lift-and-turn | Rotate cap to open/close | Very reliable, few internals | Can loosen if over-tightened | Long-term reliability |
| Push-pull | Pull up to open, push down to close | Durable, tactile | Some users find it less intuitive | Traditional setups |
| Trip lever (plunger) | Lever on overflow controls an internal plunger | Clear feedback from lever | Hair can clog internal linkage; needs access to overflow | Households that prefer lever control |
| Cable-operated | Overflow knob turns cable to actuate drain | Flexible routing, modern feel | More parts = more to fail | Freestanding where alignment is tricky |
| Exposed (clawfoot) | Visible decorative pipes and stopper | Period-correct aesthetics | Pricier, measured install | Clawfoot & heritage bathrooms |
After working through the selection steps, consider how specific bathtub scenarios—like alcove, freestanding, or clawfoot tubs—impact which assembly you choose.
Every bathtub presents unique challenges. Tailoring the drain assembly to the tub type and usage will result in the best performance.
Alcove tubs fit between three walls and often serve double duty as a shower. They come in left‑hand or right‑hand drain configurations depending on where the plumbing is located. For these tubs choose a durable material—brass for longevity or PVC/ABS for a cost‑effective solution. A toe‑touch or lift‑and‑turn stopper keeps the drain mechanism simple and easy to clean, which is important when the tub also functions as a shower. If you enjoy long baths, consider a slotted overflow plate to increase water depth without violating code.
Freestanding tubs, especially modern soakers, make a statement in the bathroom. These tubs typically have a center drain and may sit away from walls, requiring the waste and overflow pipes to run under the floor. A brass kit offers durability and stability for these larger fixtures, but a cable‑operated kit can simplify installation if the drain alignment is awkward. Pair the kit with a slotted overflow if local codes permit; deep‑soak plates maximize the tub’s water capacity for a luxurious bathing experience. Always verify that you have sufficient floor access and that the trap location aligns with the tub’s drain.
Classic clawfoot tubs and reproduction heritage models exude charm and elegance. These tubs often require exposed drain assemblies, meaning the pipes and fittings are visible. Solid brass kits with decorative detailing preserve the tub’s period aesthetic. A lift‑and‑turn or traditional plug style complements the vintage look. When choosing a finish, consider oil‑rubbed bronze, polished nickel, or unlacquered brass for a living finish that will develop a patina over time. Remember that exposed drain kits are often custom‑sized; measure carefully and be prepared to make adjustments during installation.
Material and style choices often depend on budget; understanding the differences between budget, midrange, and premium kits helps you spend wisely.
Drain assemblies span a broad price range. Understanding what distinguishes a budget kit from a premium one can help you allocate your resources wisely.
Budget‑friendly kits are typically made from PVC or ABS plastic. They include basic waste and overflow pipes, a simple toe‑touch stopper, and a standard overflow cover. These kits are ideal for guest bathrooms, short‑term residences, or homeowners on a tight budget. They work reliably but may not offer the longevity or refined look of more expensive materials. Be cautious when using them in high‑traffic bathrooms or with heavy tubs, as the plastic may wear out faster.
Midrange assemblies strike a balance between cost and durability. They may use hybrid constructions—brass trim for visible parts with plastic waste and overflow pipes—or full brass for critical components. You’ll find a wider selection of finishes and features at this level, such as slotted overflows, deeper trim options, and enhanced seals. For primary bathrooms or master suites, midrange kits often represent the best value because they deliver improved performance without the premium price tag of all‑brass kits.
Premium drain assemblies are crafted entirely from high‑quality brass or stainless steel, sometimes featuring decorative detailing and designer finishes. They include heavy‑duty concealed kits for built‑in tubs or ornate exposed kits for clawfoot installations. Premium kits often incorporate PVD coatings, easy‑clean tops, hair‑catching baskets, and other advanced features. While they come at a higher cost, premium kits provide the longest lifespan, the best warranties, and the most refined aesthetics. If your bathtub is a focal point of a luxury bathroom or you plan to remain in your home for many years, a premium kit is a worthy investment.
Before finalizing your purchase, run through this checklist to ensure you haven’t overlooked any essential detail.
To ensure you choose the perfect drain assembly, use this checklist to organize your priorities:
Even careful planners can run into trouble—here are some pitfalls to sidestep during selection and installation.
Even with careful preparation, certain pitfalls often catch homeowners off guard.
In spite of the information above, certain common questions persist; this section addresses those lingering queries.
Can I reuse my old drain assembly?
It is possible to reuse parts of an old drain, but doing so is not recommended. New gaskets and trim pieces greatly reduce the risk of leaks and refresh the appearance of the tub. If you change finishes or notice corrosion, replacing the entire assembly is a safer choice.
Are universal stoppers a good idea?
Universal stoppers can work in a pinch. They usually involve a one‑size‑fits‑most cap or plug that fits into the drain opening. While they solve immediate problems, they do not provide the same reliability or clean look as a properly fitted kit. Use universal stoppers as temporary solutions, and plan to replace the entire waste and overflow assembly for long‑term performance.
How long does a good drain kit last?
A high‑quality brass assembly can last decades when installed correctly and maintained. Replaceable components like springs in toe‑touch stoppers or baskets in hair‑catching assemblies can extend the lifespan even further. Regularly clearing hair and debris, avoiding harsh chemicals, and tightening loose parts will keep your drain functioning smoothly for years.
In 2025 choosing the right drain assembly for your bathtub involves balancing fit, function, and style. Begin by understanding the anatomy of a drain assembly and the various stopper mechanisms available. Take accurate measurements and consider material compatibility with your plumbing. Explore current design trends—such as matte black finishes and slotted overflow plates—that can elevate your bathroom’s look. Finally, follow a step‑by‑step approach to match the kit to your tub type and usage. Whether you opt for an economical PVC kit for a guest bath or a premium brass assembly for a showpiece tub, the right drain will ensure reliable performance and a pleasurable bathing experience. By doing your homework now, you’ll enjoy years of trouble‑free soaking and showering.

Eric is the founder and president of Badeloft USA. He has been the president of Badeloft’s US division for over ten years and oversees all marketing and branding aspects of Badeloftusa.com.
His expertise lies in small business development, sales, and home and bathroom industry trends and information.
Contact us with any business related inquiries.
Badeloft is dedicated to helping homeowners make informed decisions about their bathrooms. We adhere to strict editorial guidelines to ensure our content is accurate, trustworthy, and useful.
Request free stone resin and stainless steel material samples. Delivered to your door.
When you’re shopping for a freestanding bathtub, the material matters just as much as the shape or size. It changes
When remodeling your home, you may struggle finding which bathroom size is appropriate for your home. The full sized bathroom

Today’s bathtub choices are plentiful with a host of styles, shapes, sizes, and materials to choose. The choice often comes
Does adding a bathtub to your home increase its resale value? The short answer is yes, with many US homeowners
Request your free material sample below. By submitting, you agree to receive occasional product updates and offers from Badeloft. Unsubscribe anytime.
"*" indicates required fields