Bathroom Storage Trends 2026: The Planning Guide That Changes When You Choose a Freestanding Tub
Bathroom storage fails the same way every time: it gets planned last. By the time the tiles are in and
Bathroom storage fails the same way every time: it gets planned last. By the time the tiles are in and the fixtures are set, storage becomes whatever fits, an over-the-toilet shelf, a basket on the counter, a medicine cabinet that barely closes. The renovations that work start with storage mapping before a single fixture is chosen.
At Badeloft, we manufacture freestanding bathtubs and modern bathroom fixtures. Over years of working with renovators and design professionals, we have watched homeowners discover, after installation, that the tub they chose fundamentally changed how they needed to think about storage. This guide is built on that experience.
It covers both the established storage trends driving 2026 bathroom renovations and the specific planning decisions that change when a freestanding fixture is at the center of the room.
If you are mid-renovation and storage keeps getting pushed to “we will figure it out later,” that moment is closer than you think. Maybe you have already ordered a freestanding tub and realized there is no surround, no ledge, and no obvious place for your shampoo. Or you are the person who reorganizes the bathroom every few months, but the countertops are cluttered again by Tuesday — not because the system failed, but because the storage was never planned to match how you actually use the room.
By the end of this piece, you will know the correct sequence for planning bathroom storage, why a freestanding tub changes that sequence, and which material and layout decisions hold up over time versus which ones you will regret within a year.
We will cover the vanity planning decisions most homeowners get backward, a real framework for open vs. concealed storage, what nobody tells you about storage when you choose a freestanding tub, which materials survive humidity, and the planning sequence that ties it all together.
So let us start with the fixture most people plan last, and why that order is exactly wrong.
For first-time renovators who have spent months choosing tile, fixtures, and finishes, the vanity decision often arrives last, which is exactly the problem. By the time the decision lands, the plumbing is already stubbed and the options have already narrowed.
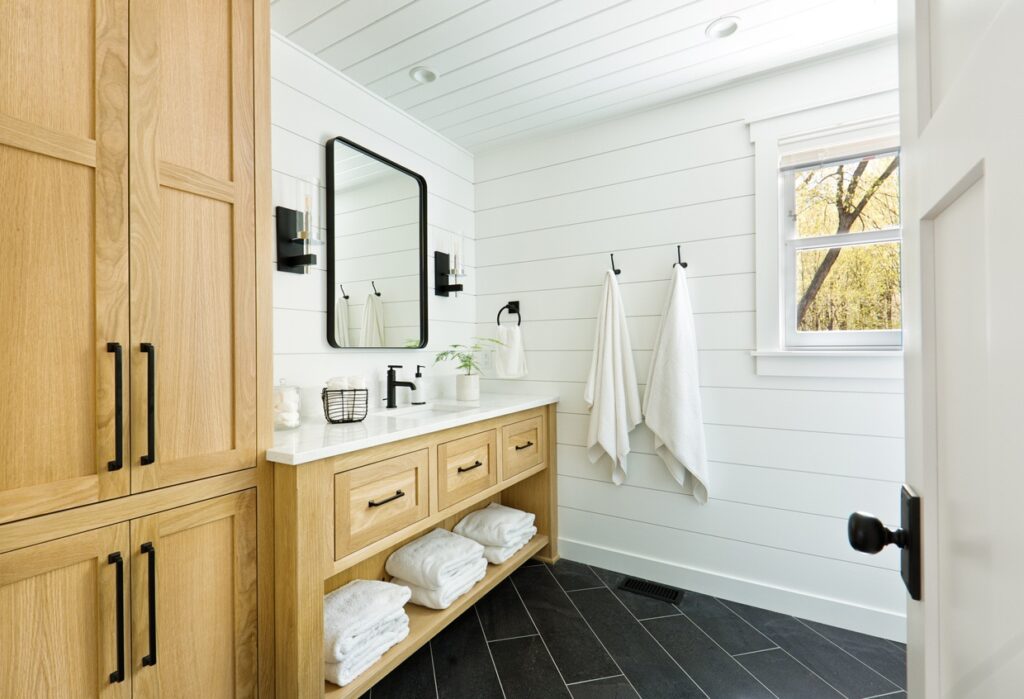
In 2026, the vanity is handling more storage load than any other element in the bathroom and renovators are responding. According to the Houzz 2025 U.S. Bathroom Trends Study, 46% of homeowners who renovated their bathrooms chose a vanity longer than 60 inches, and 13% went beyond 72 inches. Those are not aesthetic preferences. They are storage decisions.
The mistake is treating vanity size as a style choice made near the end of the renovation. Planning the vanity first means knowing, in advance: how many people use this bathroom daily, what your bathroom sinks demand in countertop depth, and where the plumbing can flex to accommodate a longer run.
If you are renovating a primary bathroom for two people, a single-sink vanity under 60 inches will fight you from day one. The counter fills up, the drawers overfill, and the storage solutions that follow are compensations for a decision made too early in the wrong direction.
One specific detail worth flagging: a drawer positioned below the plumbing, inside the vanity cabinet. Most standard configurations treat the space under the sink as a dead zone because of the P-trap and supply lines. A custom or semi-custom cabinet that routes a shallow drawer around that plumbing turns wasted space into daily-use storage — medicine, cleaning products, spare items — without adding a single inch to the footprint.
Floor-to-ceiling storage works, but only when it functions as a background element, not a focal point. A tall linen cabinet or bathroom furniture tower that runs uninterrupted from floor to ceiling on a plain wall adds meaningful capacity without competing with the room’s primary design moment.
It does not work when it competes with a window, an architectural feature, or a freestanding fixture. If the freestanding tub is the focal point of the room, which it should be, by design, a tall storage tower in its sightline turns the room into a storage closet with a nice tub in it. Vertical storage should frame the design, not fight it.
The practical rule: place vertical storage on the wall opposite or adjacent to the room’s focal fixture, never directly behind or beside it. A wall-hung tower with interior lighting and an integrated outlet, for a toothbrush charger or a hair tool, is the current standard for this format. Contained, functional, visually clean.
The standard advice on open vs. concealed storage is “use both.” That is not a decision. It is a non-answer. Here is the actual framework.
Open storage is for items you use every day and are comfortable displaying: folded towels, one or two curated objects, a plant. Everything else medications, cleaning products, extra stock, personal care items, goes behind a door.
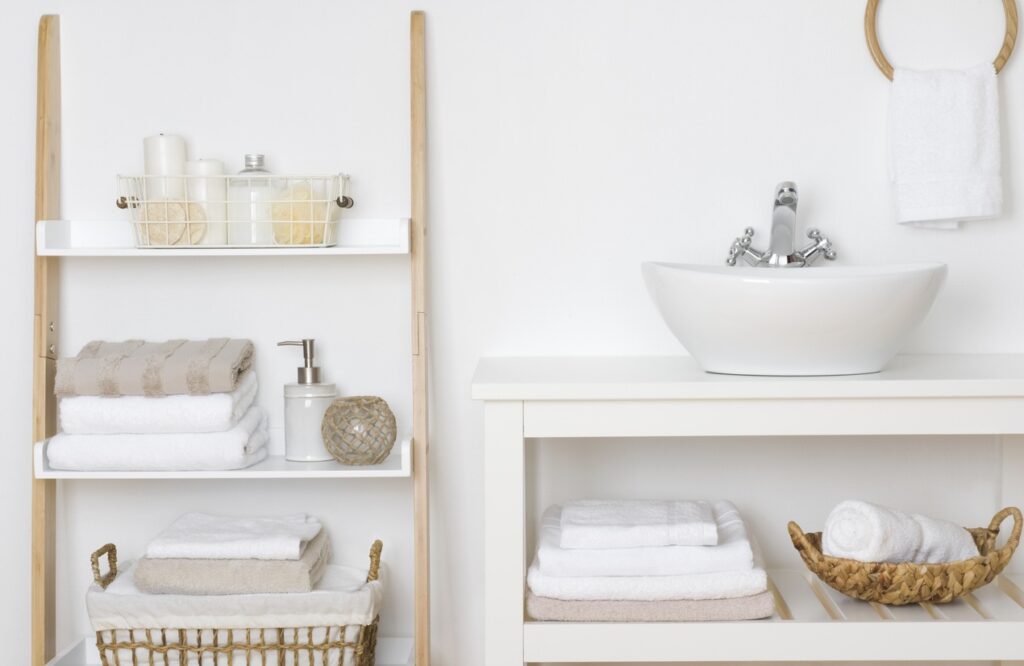
And the frustration is real. When every design inspiration image shows a curated open shelf with three linen towels and a trailing plant, it feels achievable. Then you live with it for a week. Open shelves in bathrooms accumulate dust and humidity residue faster than most people expect. The ones that look great in design photos look that way because a stylist edited them thirty minutes before the shoot.
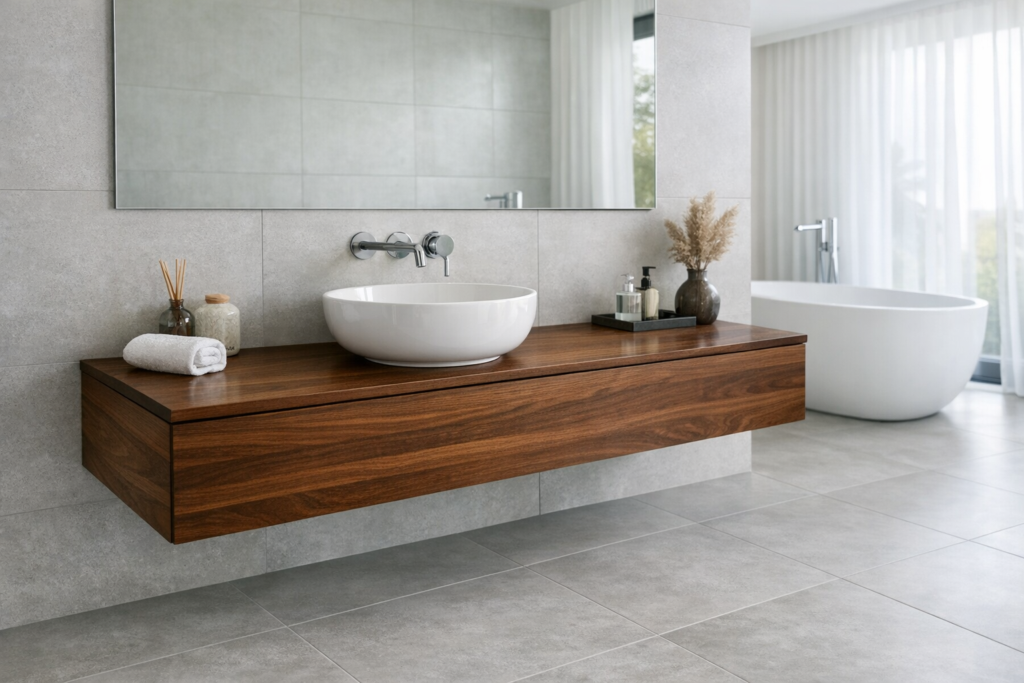
In a bathroom centered on a freestanding tub, the tub itself is the open element. It is sculpture. It occupies visual space and draws the eye. Storage in this context should be almost entirely concealed to give the tub room to read. Two open shelves at most, placed deliberately, with items that can withstand humidity and still look intentional after a month of daily use. Everything else in a cabinet.
The people who get this right are not more disciplined about organization. They simply designed a bathroom where concealed storage makes discipline unnecessary.
For those who just received delivery on their first freestanding tub, this is the moment most people realize they did not plan for it.
Here is what no bathroom storage article tells you: when you install a freestanding tub, you eliminate the default storage surface that most people do not realize they were relying on.

In an alcove tub installation, the surround, the tiled deck that runs along one or both sides — functions as a ledge. Shampoo, conditioner, bath salts, a candle, a book. It all lives there, and you do not have to plan for it because it is built in. When that tub comes out and a freestanding fixture goes in, the ledge goes with it. The surround disappears before anyone thought to ask what would replace it.
There are three approaches that work:
A wall ledge running the full length of the wall behind or beside the tub. Not a shelf, a continuous ledge, 4–6 inches deep, at tub-surround height. It holds products without cluttering the floor zone and keeps the tub’s profile visible from every angle. This needs to be specified before installation, not added after.
A floor-standing bath caddy, tray stand, or similar bathtub accessories positioned at the end of the tub. This is the most flexible option. It moves, requires no wall modification, and reads as a design object in the right material — teak, brushed metal, matte black powder coat. The trade-off: it occupies floor space, and most freestanding tubs require a minimum of 8–12 inches of clearance on at least two sides, per the NKBA Bathroom Planning Guidelines.
A recessed wall niche adjacent to the tub: not inside the wet zone, but within reach. Lower profile than a shower niche, typically 4–6 inches deep, finished to match the wall tile or paint. Installation complexity is higher, and it needs to be roughed in before tile, but it is invisible when not in use and takes no floor space.
Which approach fits your bathroom depends on the tub profile, the wall configuration, and whether you are roughing in before or after tile — the same planning conversation that governs freestanding tub faucet placement. Have it with your contractor before the tub is ordered, not after it is set.
Get these decisions locked in at the planning stage and you will never be searching for your shampoo on the edge of a tub that was never designed to hold it.
Recessed niches have become a standard feature in modern bathroom design, and for good reason. When placed correctly, they eliminate surface clutter without eliminating storage capacity.
The two zones where niches reliably work: inside the shower, and beside the vanity at counter height. In the shower, a recessed niche with a waterproofed backing and a sloped floor keeps bottles accessible and draining. Beside the vanity, a shallow niche at arm height functions like an open shelf without protruding into the room.
What should not go in the wall: niches adjacent to exterior walls (thermal bridging and moisture risk), niches in wet zones that were not waterproofed correctly (mold behind tile is a renovation nightmare), and niches placed so low or high that they fall outside comfortable reach. A niche at baseboard height is not accessible storage. It is decoration.
Material matters inside niches. Tile that matches the surrounding field reads as seamless. A contrasting tile or stone slab reads as a feature. Painted drywall in a niche that gets splashed regularly will eventually fail, regardless of paint quality.
One of the most consistent frustrations we hear from bathroom renovators is discovering, a year in, that the storage furniture they bought has started to swell or delaminate at the edges. Particleboard and standard MDF look identical to moisture-resistant alternatives on a retail shelf. The difference shows up 18 months later, and by then the renovation is done and the budget is gone.
The materials that hold up in a high-humidity bathroom: solid teak (naturally oil-rich and resistant to moisture-induced warping), marine-grade PVC (indistinguishable from painted wood at a glance, but impervious to humidity), and stone or tile shelving in wet zones (no moisture absorption whatsoever).
The materials that fail faster than expected: standard MDF swells and delaminates within 18–24 months in a bathroom with daily shower use. Particleboard is worse. Untreated solid wood fails unless the species is naturally moisture-resistant. Most flat-pack bathroom furniture uses moisture-resistant MDF, which is better than standard MDF but not the same as moisture-proof — and the distinction matters in a room that steams up daily.
For shelving adjacent to a freestanding tub — a wall ledge or a floor-standing caddy — teak or powder-coated steel are the correct default. Both handle splashing without warping or rusting at the surface. The floor-standing caddies available in both materials are not equivalent in longevity: teak expands and contracts seasonally but recovers; steel can rust at joints if the coating is scratched and left wet.
If you are in the pre-construction or pre-permit planning stage, you have a window most renovators do not get. Most bathroom renovations follow the order that feels natural: choose the aesthetic, select the fixtures, decide whether to install flooring or the bathtub first, and then figure out storage. The frustration most homeowners describe at the end of a renovation is not the expense or the timeline. It is discovering that the storage added last has to work around every decision made first — and it rarely does.
The sequence that produces bathrooms with storage that works runs the other way. Here is how to run a storage zone mapping session before your next contractor conversation:
Storage infrastructure — niches, blocking for wall-mounted cabinets, electrical for lighted towers — all needs to be roughed in before anything is closed up. For everything that happens at the rough-in stage, our full guide on how to install a freestanding bathtub walks through the sequence in detail.
Bathroom storage with built-in technology has been growing steadily. The Houzz 2025 Bathroom Trends Study reported a 3 percentage point year-over-year increase in cabinet lighting adoption, and the format is maturing beyond novelty into something genuinely useful.
The integrations that earn their place: interior cabinet lighting (useful for finding things in deep drawers without pulling everything out), integrated outlets inside vanity towers (keeps charging cables off the counter permanently), and mirrors with built-in storage and dimmable lighting (replaces the medicine cabinet format with something that is both functional and finished).
The ones that do not earn their place: voice-activated cabinet openers, Bluetooth speakers mounted inside storage units, and any tech element that requires a proprietary app to configure. The rule for tech storage is the same as the rule for any storage: it should serve a behavior you already have, not create a new one.
The tub is the variable that changes everything else in the bathroom plan. Badeloft’s freestanding bathtub collection includes detailed clearance specifications, installation profiles, and spatial planning guidance for every fixture — so when you sit down with a contractor, the storage conversation starts with real numbers, not guesswork. When you are ready to see what fits your space, browse our freestanding bathtub collection and find the fixture that makes the room work from the day it is installed — and every day after that.

Eric is the founder and president of Badeloft USA. He has been the president of Badeloft’s US division for over ten years and oversees all marketing and branding aspects of Badeloftusa.com.
His expertise lies in small business development, sales, and home and bathroom industry trends and information.
Contact us with any business related inquiries.
Badeloft is dedicated to helping homeowners make informed decisions about their bathrooms. We adhere to strict editorial guidelines to ensure our content is accurate, trustworthy, and useful.
Request free stone resin and stainless steel material samples. Delivered to your door.
Bathroom storage fails the same way every time: it gets planned last. By the time the tiles are in and
A waterfall faucet is one of the most visually compelling fixtures a bathroom can have. It’s also one of the
Choosing a bathtub color is one of the few bathroom decisions you’ll live with for 15 to 20 years. Get
Most bathtub decisions come down to what fits the space and what fits the budget. That is a reasonable starting
Request your free material sample below. By submitting, you agree to receive occasional product updates and offers from Badeloft. Unsubscribe anytime.
"*" indicates required fields