Bathroom Storage Trends 2026: The Planning Guide That Changes When You Choose a Freestanding Tub
Bathroom storage fails the same way every time: it gets planned last. By the time the tiles are in and
Removing a bathtub is one of those projects where the gap between “this looks manageable” and “why didn’t I hire someone” closes fast. The weight of a cast iron tub, the plumbing configuration of a freestanding bath, and the structural load on an aging subfloor refuse to announce themselves until you’re mid-removal with a 400-pound tub sitting crooked on a furniture dolly.
This guide covers every type of removal: alcove tubs, freestanding baths, cast iron, stone resin, acrylic, and fiberglass. As a manufacturer that builds freestanding bathtubs from the ground up, we know exactly what each tub type demands when it leaves a bathroom, and we’ve included the details that most removal guides skip entirely.
The single most important variable in a bathtub removal isn’t your plumbing skill or your tool selection. It’s the tub itself, specifically what it’s made of and how it’s installed.
Alcove tubs are built into a three-wall enclosure and secured to studs with a nailing flange. Freestanding tubs sit on their own feet with no structural connection to the walls. Drop-in tubs rest in a deck or platform. Each removes differently, connects to plumbing differently, and creates different risks during transport.
Before you do anything, understand what you have:
Freestanding and drop-in tubs are increasingly common in bathroom renovations, and they’re almost never covered in standard removal guides. We’ll give them proper attention here.
The difference between a clean removal and a damaged bathroom is almost always the planning phase.
Your tub needs a clear path from bathroom to truck. Measure the tub’s length, width, and height including feet or decorative elements. Then measure every doorway, hallway, and corner along the exit route.
The critical measurement most people miss is the turning radius at corners. A 60-inch tub can fit through a 30-inch doorway when carried straight, but turning it through a hallway corner is a completely different geometry problem.
Write down the narrowest point along every segment of the exit route. That narrowest point determines whether the tub comes out intact or in pieces.
For cast iron and steel tubs, this is a real decision. Preservation means moving the tub whole: higher risk, more labor, but it stays intact for resale or donation. Demolition means smashing it into sections, which is faster and easier but leaves the tub unusable.
For stone resin, acrylic, and freestanding tubs, demolition usually isn’t an option. Stone resin can’t be smashed cleanly and may contain materials that complicate disposal. High-quality freestanding tubs are worth preserving for resale if the removal is done carefully.
For fiberglass and standard acrylic alcove tubs, cutting into sections with a reciprocating saw is almost always the right call.
Remove the toilet before the tub removal begins. Remove the vanity if it’s in the path. Take doors off their hinges, because every extra inch of clearance matters when you’re maneuvering a heavy object through a small space.
If the tub is upstairs, the staircase is your most dangerous obstacle. We’ll cover stair removal in detail later.
Cover every floor surface along the exit route with heavy-duty drop cloths. For bathrooms with stone or tile flooring, add a sheet of half-inch plywood on top of the drop cloth. The plywood distributes the weight of dollies and prevents the tub from concentrating pressure on a single tile.
Shield any fixtures in the path. Cover the toilet with a moving blanket. Protect the mirror, countertop, and any remaining fixtures that could catch flying debris during tile or caulk removal.
Safety:
Plumbing:
Demolition and Detachment:
Transport:
For cast iron or stone resin tubs weighing 300 pounds or more, add a powered stair-climbing dolly to your list if there are stairs involved. Renting one costs $115–$160 per day, a fraction of the cost of a damaged wall or a back injury.
| Category | Tool/Material | Purpose |
| Safety | Work Gloves, Safety Goggles, Dust Mask, Steel-Toed Boots | Personal protection from cuts, impacts, dust, and crushing injuries. |
| Plumbing | Adjustable Wrench, Pipe Wrench, Channel-Lock Pliers | Disconnecting water supply lines, faucet hardware, and drain pipes. |
| Tub Drain Wrench (Dumbbell Wrench) | Specifically designed to engage and unscrew the bathtub drain flange. | |
| Screwdriver Set (Phillips & Flat-Head) | Removing faucet handles, overflow plates, and other fixture screws. | |
| Demolition & Detachment | Utility Knife / Razor Blade | Cutting caulk seals around the tub; scoring drywall or wall panels. |
| Pry Bar | Prying the tub away from walls; removing nails securing the tub flange to studs. | |
| Hammer & Chisel | Chipping away tile surrounding the tub; breaking stubborn drain flanges. | |
| Reciprocating Saw (with demolition blades) | Cutting through acrylic/fiberglass tubs, wall materials, and sometimes drain pipes. | |
| Sledgehammer (16-pound recommended) | Breaking cast iron or enameled steel tubs into manageable pieces. | |
| Transport | Furniture Dolly / Appliance Dolly | Moving the tub across flat surfaces (furniture dolly) or up/down stairs (appliance dolly). |
| Moving Straps (e.g., Shoulder Dolly) | Using leverage to lift and carry heavy tubs, freeing hands for stabilization. | |
| Moving Blankets | Protecting the tub and home surfaces from scratches and impacts during transport. | |
| Site Prep & Cleanup | Drop Cloths / Plastic Sheeting | Protecting floors and fixtures from water, dust, and debris. |
| Plywood Sheets | Distributing the weight of heavy tubs to protect floors from damage. | |
| Buckets & Sponges | Catching residual water from drain lines; general cleanup. | |
| Shop Vacuum | Efficiently cleaning up fine dust and small debris after removal. |
Be honest about this question. The average homeowner can remove a standard fiberglass or acrylic tub with one or two helpers and a basic tool set. A 450-pound cast-iron tub on a second-floor bathroom is a different conversation.
| Item/Service | DIY Cost (Rental/Purchase) | Professional Cost (Service Fee) | Key Considerations |
| Labor | $0 (personal time and effort) | $80 – $100 per hour (2 movers) | Professionals are experienced, insured, and work efficiently. DIY requires at least one strong partner. |
| Appliance Dolly | $20 – $30 per day | Included in service | Essential for moving heavy tubs, especially on stairs. |
| Powered Stair-Climbing Dolly | $115 – $160 per day | Included in service (specialty movers) | Highly recommended for heavy tubs on stairs to minimize risk of injury and damage. |
| Moving Blankets/Pads | $9 – $19 per pad (purchase) | Included in service | Necessary for protecting both the tub and the home’s surfaces. |
| Liability for Damage | Full personal liability | Covered by mover’s insurance | The cost of repairing a damaged wall, floor, or the tub itself can exceed the cost of hiring movers. |

Locate the dedicated shut-off valve for the bathroom. If there isn’t one, use the main water shut-off for the house. Ball valves close with a quarter-turn; gate valves require turning clockwise until fully stopped.
After shutting off water, open the faucet to relieve pressure and drain the supply lines. Have a bucket and towels ready, as there will be residual water in the P-trap and supply lines.
For jetted or air-bath tubs, switch the circuit breaker for the tub’s dedicated circuit to OFF and verify it’s off before touching any plumbing. Jetted tubs are hardwired; cutting the circuit is not optional.
Faucet handles typically have a decorative cap covering a set screw. Pop the cap with a flathead screwdriver, remove the screw, and pull the handle off the stem.
Tub spouts attach either by a set screw on the underside or by threading directly onto a pipe. Check for a set screw first. If there isn’t one, the spout unscrews counter-clockwise. Don’t force it; older spouts can be corroded in place.
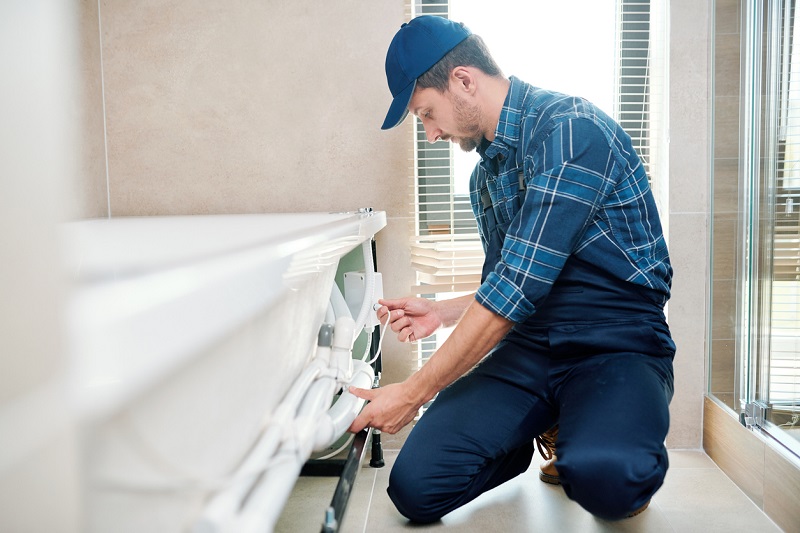
For freestanding tubs with floor-mounted faucets, the faucet body disconnects from the supply lines at the floor connection. You’ll need to access the supply line connections under the floor to fully cap or disconnect the plumbing, typically through a basement ceiling, crawlspace, or access panel.
First, identify your drain stopper type. Trip-lever stoppers have a visible lever on the overflow plate. Lift-and-turn and toe-touch stoppers have no visible mechanism above the drain. Pop-up stoppers are common in newer alcove tubs.
Remove the stopper according to its type, then remove the drain flange using a dumbbell wrench. Insert the crossbar into the drain opening and turn counter-clockwise. For seized drains, apply heat from a heat gun for 30–45 seconds before attempting to turn; the metal expansion often breaks the corrosion seal.
Once the drain flange is out, disconnect the waste and overflow assembly from the P-trap. The P-trap is the curved pipe below the tub, accessible from below the floor or through an access panel. Disconnect the drain pipe at the trap and have a bucket ready for residual water.
For freestanding tubs, the drain connection is typically more accessible because the plumbing is exposed rather than hidden in walls. However, freestanding tubs often use a different waste assembly than alcove tubs; the drain may connect to a floor drain box rather than a traditional P-trap. Take a photo of the full plumbing configuration before disconnecting anything.
For alcove tubs, score along the caulk line at the tub-to-wall joint with a utility knife. Make two passes: one along the tub surface and one along the wall. Peel the caulk out using a plastic putty knife. For stubborn caulk, apply heat from a heat gun for 15–20 seconds per section to soften it.
Once the caulk is removed, remove any tile, backerboard, or surround material covering the nailing flange. The nailing flange runs along the top edge of the tub where it meets the wall. Expose the flange, then remove the screws or nails securing it to the studs.
For freestanding tubs, there is no nailing flange and no wall caulk. The tub simply sits on the floor on its feet. Once the plumbing is disconnected, it’s physically free, which makes freestanding removal simpler in terms of demolition. However, it also means there’s nothing stabilizing the tub while you work. Have a helper hold the tub steady if it’s a heavier model.
Every removal guide covers alcove tub removal. Almost none cover what makes freestanding removal different, which matters significantly if that’s what you’re dealing with.
The plumbing is different. Alcove tubs connect to plumbing in the wall behind the tub. Freestanding tubs connect through the floor or via a freestanding faucet supply line. Floor-connected plumbing means you’re working below the finished floor level to disconnect supply lines, typically through an access panel, a basement ceiling, or by carefully removing a section of flooring adjacent to the tub.
The tub is not stabilized. An alcove tub is surrounded on three sides and nailed to studs. A freestanding tub stands on feet with no structural connection to the room. During plumbing disconnection, particularly if you’re working on the drain from below, the tub can shift. Always have a second person stabilizing the tub during disconnect work.
The finish is more exposed. Freestanding tubs are visible from all sides, which means every surface is a finished surface. Any contact with a wall, door frame, or dolly during removal can scratch or chip the exterior. Wrap the entire tub in moving blankets secured with moving tape before placing it on a dolly, not after.
The feet are a complication. Most freestanding tub feet are adjustable legs or decorative claw feet. They extend the tub’s footprint during transport and create a fulcrum point when the tub is tilted. Either remove the feet before moving if they detach cleanly, or pad them heavily to prevent gouging the floor surface beneath.
| Material Type | Average Weight (lbs) | Key Characteristics | Primary Removal Method | Transport Difficulty | Disposal Path |
| Cast Iron | 300 – 500+ | Extremely heavy, rigid, brittle enamel finish. | Demolition (Sledgehammer) | Very High | Scrap Metal Recycling |
| Enameled Steel | 70 – 150 | Lighter than cast iron, rigid, brittle enamel finish. | Demolition or Team Lift | High | Scrap Metal Recycling |
| Acrylic | 70 – 100+ | Lightweight, rigid, scratch-resistant, uniform color. | Cutting (Reciprocating Saw) | Low | Landfill/Waste Transfer |
| Fiberglass | 30 – 70 | Very lightweight, flexible, prone to scratching/fading. | Cutting (Reciprocating Saw) | Very Low | Landfill/Waste Transfer |
| Stone Resin | 300 – 900+ | Extremely heavy, solid surface, must be preserved. | Team Lift with Blocking/Levers | Extreme | Construction Debris Landfill |
Acrylic and fiberglass tubs weigh 30–100 pounds and flex under pressure; they are not candidates for sledgehammer demolition.
The right approach is to use a reciprocating saw with a demo blade to cut the tub into 2–3 sections. Cut along the bottom edges and straight across the middle. The sections can then be carried out individually. This approach also works well in tight bathrooms where maneuvering a full-length tub is difficult.
Wear your N95 mask during fiberglass cutting; the dust is an irritant.
Cast iron tubs weigh 300–500 pounds. Enameled steel runs 70–150 pounds, which is significantly lighter and more manageable.
Identify which you have with a magnet. Both cast iron and enameled steel will hold a magnet; acrylic and fiberglass will not.
For cast iron, you have two paths:
Preservation (difficult): Requires 3–4 people minimum, a heavy-duty furniture dolly, moving straps, and careful coordination. The tub must be lifted onto its end or side to clear doorways, then moved incrementally with the dolly. Expect this to take 2–4 hours with a skilled team.
Demolition (faster): Cover the tub with a moving blanket to contain shards. Use a 12–16 pound sledgehammer to break it into manageable sections. Cast iron breaks into heavy chunks that still require careful handling; each piece may weigh 50–80 pounds.
One thing worth knowing: old cast iron tubs have real value. Scrap metal recyclers will often take them, and original claw-foot cast iron tubs in good condition have genuine resale demand. If the enamel is intact, preservation is almost always worth the extra effort.

Stone resin tubs, including the freestanding models we manufacture at Badeloft, weigh between 300 and 900 pounds depending on size and wall thickness. They cannot be demolished; the composite material doesn’t break cleanly, and the resulting debris is difficult to dispose of safely.
Stone resin removal requires preservation by default. That means planning a 4–6 person team, using heavy-duty suction cups as handholds (the smooth exterior gives nothing to grip), and incrementally lifting the tub using wood blocks to get it onto a dolly.
The incremental lift method: Place 2×4 blocks under the feet, then 4×4 blocks, continuing to add height until the tub sits high enough to slide a heavy-duty dolly platform underneath. This approach distributes the lift across multiple people over multiple small increments rather than one full lift, which dramatically reduces injury risk.
Something we know from building these tubs: the weight distributes very differently than most people expect. The walls are substantially thicker than they appear from the outside, and the bottom basin holds a disproportionate amount of the total weight. When tilting a stone resin tub, tip it toward the head end (where the back slope meets the basin floor) rather than from the sides; the geometry is more stable and less likely to shift unpredictably.
A four-wheel furniture dolly with a flat platform works well on level surfaces and allows the tub to be moved horizontally without lifting.
A two-wheel appliance dolly is essential for stairs and for transitions between rooms. It provides leverage and has integrated straps for securing the load.
For tubs over 300 pounds involving stairs, a powered stair-climbing dolly is the safest option. These machines use rotating treads to walk the load down stairs without the full weight being handled manually. Professional movers use them for a reason, and renting one costs $115–$160 per day.
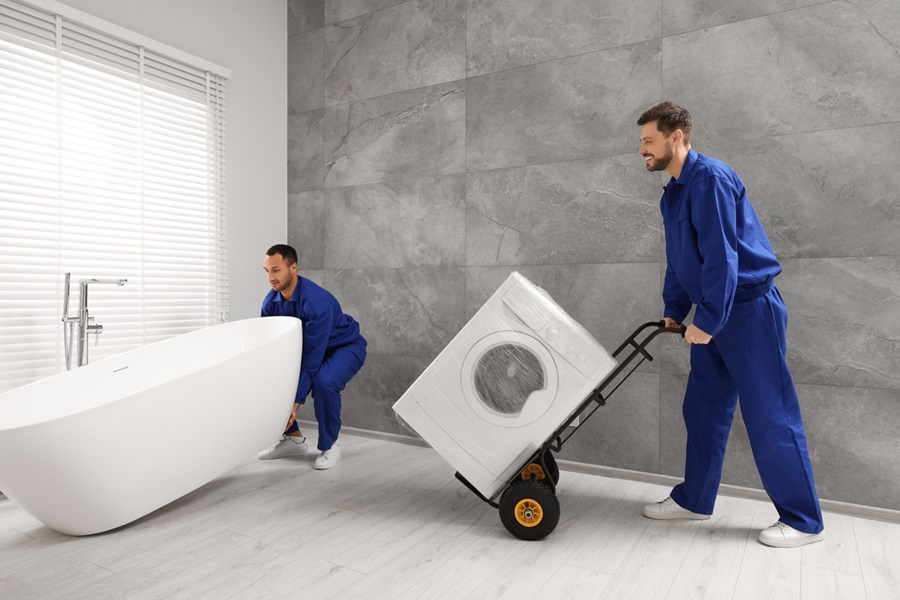
Establish a leader before anyone touches the tub. The leader calls all moves and transitions. A consistent command structure, such as “Prepare to lift… lift on three,” prevents people from lifting at different moments, which is when injuries and drops happen.
Keep backs straight and bend at the knees. Move in small steps with feet; never rotate the torso with a load in hand. When you need to change direction, set the tub down, reposition, and lift again.
Stairs are where the most damage and injuries occur during a bathtub removal.
For a two-wheel appliance dolly on stairs, one person pulls from above, positioned on a step above the tub, while one or two people support from below. The person above controls pace; the people below prevent tipping. Never let the tub build momentum on a staircase.
For heavy tubs, a powered stair-climbing dolly eliminates most of the manual risk. The machine handles the load-bearing work; your team guides and stabilizes.
One consistent mistake is trying to navigate stairs with a tub that should have been cut into sections first. A 70-pound fiberglass section is manageable on stairs. A 400-pound intact cast iron tub is not, regardless of how many people you have.
This section doesn’t appear in most removal guides, but it’s worth understanding, especially if you’re removing a heavy tub from an upper floor.
Standard residential floor joists support roughly 40 pounds per square foot for live loads. A cast iron tub weighing 450 pounds distributed across 16 square feet of floor (a typical tub footprint) comes to about 28 pounds per square foot while installed. That’s within spec.
The problem happens during removal, when the weight concentrates. A dolly holding a 450-pound tub has a contact area measured in square inches, not square feet. That’s why plywood sheets matter: they redistribute concentrated load across a larger floor area and reduce the risk of point-load damage to the subfloor.
In older homes, particularly those built before 1970, floor joists may already be compromised by decades of moisture. If the subfloor feels soft or springy anywhere along the exit route, have a contractor assess it before attempting to move anything heavy. A weakened joist under a 400-pound moving load is a serious structural risk.
Once the tub is out, inspect the subfloor and exposed framing before anything else. Look for:
This is the most important moment in any bathroom renovation: the point where what’s been hidden under the tub for years becomes visible. Addressing moisture damage now, before a new tub goes in, prevents the same problems from compounding under the next fixture.
If you find rot, stop. A licensed contractor needs to assess the extent before you proceed.
Cast iron and enameled steel: Contact scrap metal recycling facilities. Cast iron is valuable scrap; many recyclers will collect it for free or offer a small payment for the material.
Acrylic and fiberglass: If the tub is in usable condition, Habitat for Humanity’s ReStore locations accept porcelain and acrylic tubs for resale. Otherwise, contact your municipality; most accept these as construction debris at the transfer station.
Stone resin: Treated as non-hazardous construction debris. Contact your local landfill in advance, as some facilities require prior notice for bulky composite items.
Freestanding tubs in good condition: These have genuine resale value, particularly cast iron claw-foot models and stone resin freestanding baths. Listing on Craigslist, Facebook Marketplace, or architectural salvage sites often finds buyers willing to arrange their own transport, which solves the disposal problem and puts money back in your pocket.
The subfloor is exposed. The plumbing is capped. The measuring tape is already in your hand.
If the reason you removed the tub is replacement, particularly a new freestanding bathtub, this is the moment to confirm your measurements, verify your floor can support the new weight, and make sure the drain location aligns with the new tub’s drain placement. Freestanding tubs require a floor drain that matches the new tub’s drain offset, which varies by model.
If you’re choosing a new freestanding bathtub, work backward from the removal you just completed. The tub that gave you the most difficulty, whether because of weight, finish fragility, or plumbing access, tells you something about what to look for in the next one. We build freestanding bathtubs with removal in mind: accessible drain assemblies, feet that detach cleanly, and weight specs listed up front so you can plan the installation and eventual removal before the tub arrives.

Eric is the founder and president of Badeloft USA. He has been the president of Badeloft’s US division for over ten years and oversees all marketing and branding aspects of Badeloftusa.com.
His expertise lies in small business development, sales, and home and bathroom industry trends and information.
Contact us with any business related inquiries.
Badeloft is dedicated to helping homeowners make informed decisions about their bathrooms. We adhere to strict editorial guidelines to ensure our content is accurate, trustworthy, and useful.
Request free stone resin and stainless steel material samples. Delivered to your door.
Bathroom storage fails the same way every time: it gets planned last. By the time the tiles are in and
A waterfall faucet is one of the most visually compelling fixtures a bathroom can have. It’s also one of the
Choosing a bathtub color is one of the few bathroom decisions you’ll live with for 15 to 20 years. Get
Most bathtub decisions come down to what fits the space and what fits the budget. That is a reasonable starting
Request your free material sample below. By submitting, you agree to receive occasional product updates and offers from Badeloft. Unsubscribe anytime.
"*" indicates required fields